What's new in iCompta 6 ?
There are a lot of changes in iCompta 6 if you've already been using a previous version of iCompta so here is a short list of major new features.
Complete overhaul of the app
The database format has been rewritten completely to be faster and more reliable.
Many interface changes were implemented for greater ease of use.
Transactions
Everything has been done to make creating a new transaction faster and easier. For example it's now possible to hide the fields you don't use in the transaction editing window to free some place. There is also a new window for creating a new transaction quickly and easily. Splits are handled in a better way to avoid entering same information twice. There is also a new action to categorize transactions from previous transactions automatically.
An WATCH app has been included to enter a new transaction quickly and see the balance of your accounts at any moment.
All details in the transactions section.
Budgets
The previous periods of a budget are now frozen and keep the budgeted amount they had when they were created even if you change the budgeted amount later. You can put a 0 amount line in a budget and you can add a line that will include transactions not included in other lines. There is also a new action to add missing categories to a budget and you can change the start date and the end date of several lines of a budget at once.
More info in the budgets section.
Reports
The balance evolution graph is now more customizable and allows you to see the evolution of your net worth over years for example. The display of all reports has been improved with a particular attention to keep the legend visible while scrolling.
Transactions preview
3D Touch is supported in reports and budgets so you can make a deep touch on a line in a report or a progress bar of a budget item to preview the corresponding transactions.
Rules
The rules engine offers new possibilities and you can extract a date from text for example.
Professional features
You can import clients and invoices from a CSV file. You can print the list of invoices and there is also a new default invoice printing template. It's now easier to keep the link between your invoices and your transactions as you can create the corresponding transaction directly from an invoice. The invoices now have a due date which make them appear in red when the payment has not been received yet. Finally you can now handle estimates and credit notes in addition to invoices, you can set a discount for an invoice and you can manage several companies.
You can learn more about that here.
Transferring your accounts from an older version
- If you have version 3.1.19
Select the "Web server" line in the main list then click on the "Make a backup" > "Open in…" and choose "Import with iCompta 6" in the menu that appears.
- If you have version 3
You just have to copy your accounts files which names ends with .comptadb from iCompta 3 to iCompta 6 using iTunes file sharing.
- If you have version 2
You just have to copy the accounts file Document.compta from iCompta 2 to iCompta 6 using iTunes file sharing.
- Any version
First you need to get your .compta or .comptadb accounts file by going in the "Web server" line of the main list. Then you can either email yourself a backup or connect to the embedded web server from your PC / Mac.
Once you have your accounts file you can transfer it to the new version using iTunes file sharing or by sending yourself an email (if not already done) then selecting the attachment and finally choosing "Import with iCompta 6".
Transferring your accounts from the Lite version
In the Lite version, select the "Backup" line in the main list then click on the "Export a backup" button and choose "Import with iCompta 6" in the menu that appears.
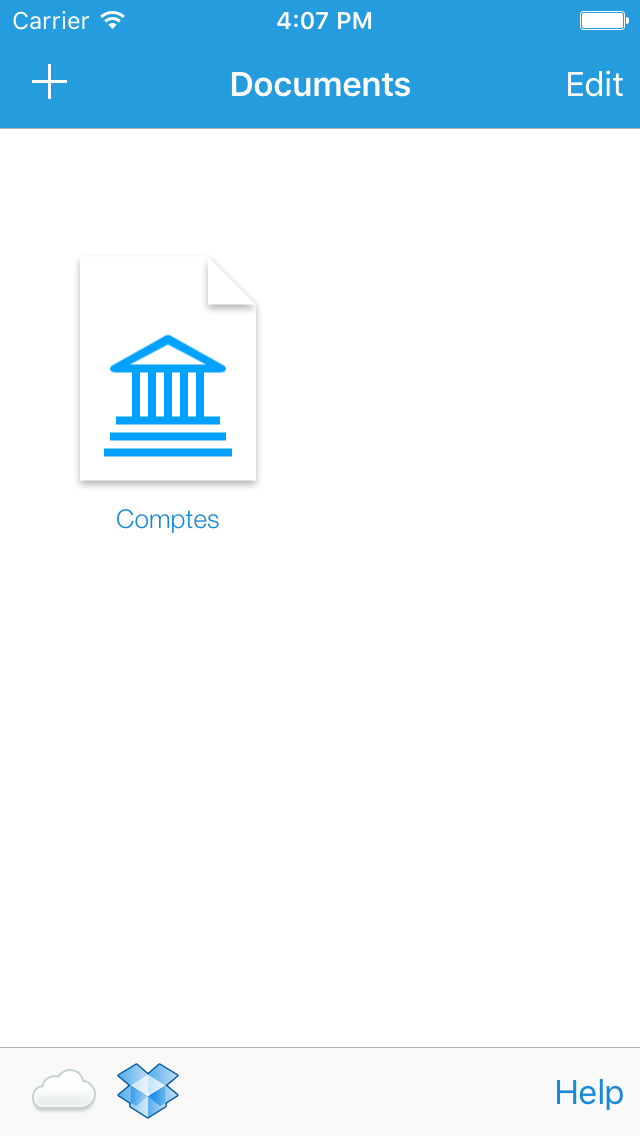
Managing documents
A document is where all your data (accounts, transactions, etc.) is stored. In iCompta you can manage different sets of accounts in separate documents, one for your personal accounts and one for your professional accounts for example. If you need to restore your device or reinstall iCompta make sure to save your documents using the embedded web server or iTunes file sharing so that you can copy them back when done.
Creating a new document
You can create a new document by touching the + button in the top left corner.
Getting an existing document from the cloud
If you have installed iCompta on an other device and have already synchronized a document on the cloud, you can get this document back by touching the iCloud or Dropbox icon in the bottom toolbar.
Getting an existing document from another device
If you have installed iCompta on another device you can also get your document back with a local network synchronization if the two devices are connected to the same local network. Create a new document as explained above and make a local network synchronization using the replace mode.
Deleting a document
You can delete a document by touching the edit button in the top right corner and then by touching the red delete button.
Renaming a document
You can rename a document by touching the edit button in the top right corner and then by touching the blue pencil button.
Closing a document
You can close a document by touching the close button in the top left corner of the main list to go back to the list of documents.
Saving a document
When you make changes, they are automatically saved on a regular basis but you can also trigger the save by touching the save button under the accounts list. In addition to saving the document, this button also sends your changes to the cloud if you have enabled iCloud or Dropbox synchronization.
User interface basics
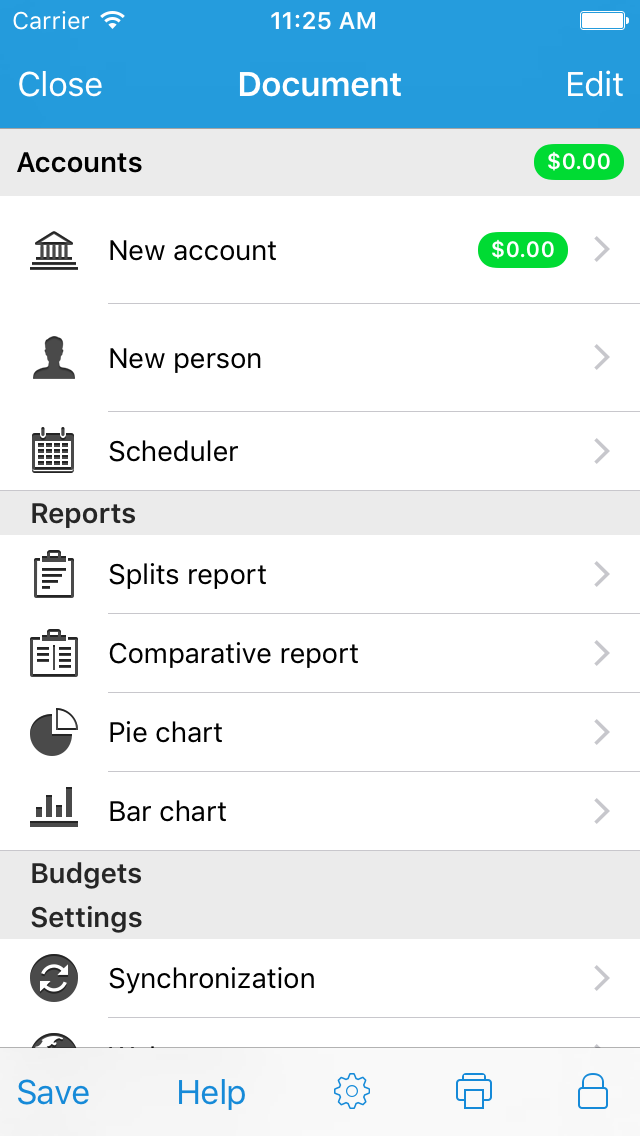
The main window of an iCompta document is a list which lets you access the main elements : accounts, scheduler, budgets, reports, budgets, synchronization, currencies, categories, securities, rules, taxes, companies, clients and invoices. These different elements are detailed in the next chapters.

By default, selecting an item in the list will display its contents (the transactions of an account for example). The edit button in the top right corner switches the list in edit mode. In this mode selecting a line shows the window to modify its parameters (the account editing window for example). The edit mode also adds new rows to the list to create an account, a report or a budget. Last, the edit mode lets you reorganize items in the order you want thanks to the 3 little lines at the right of the rows.
At the very bottom of the the list, there are some buttons allowing you to save the document, show the preferences window, print the accounts list and protect the document with a password on open.
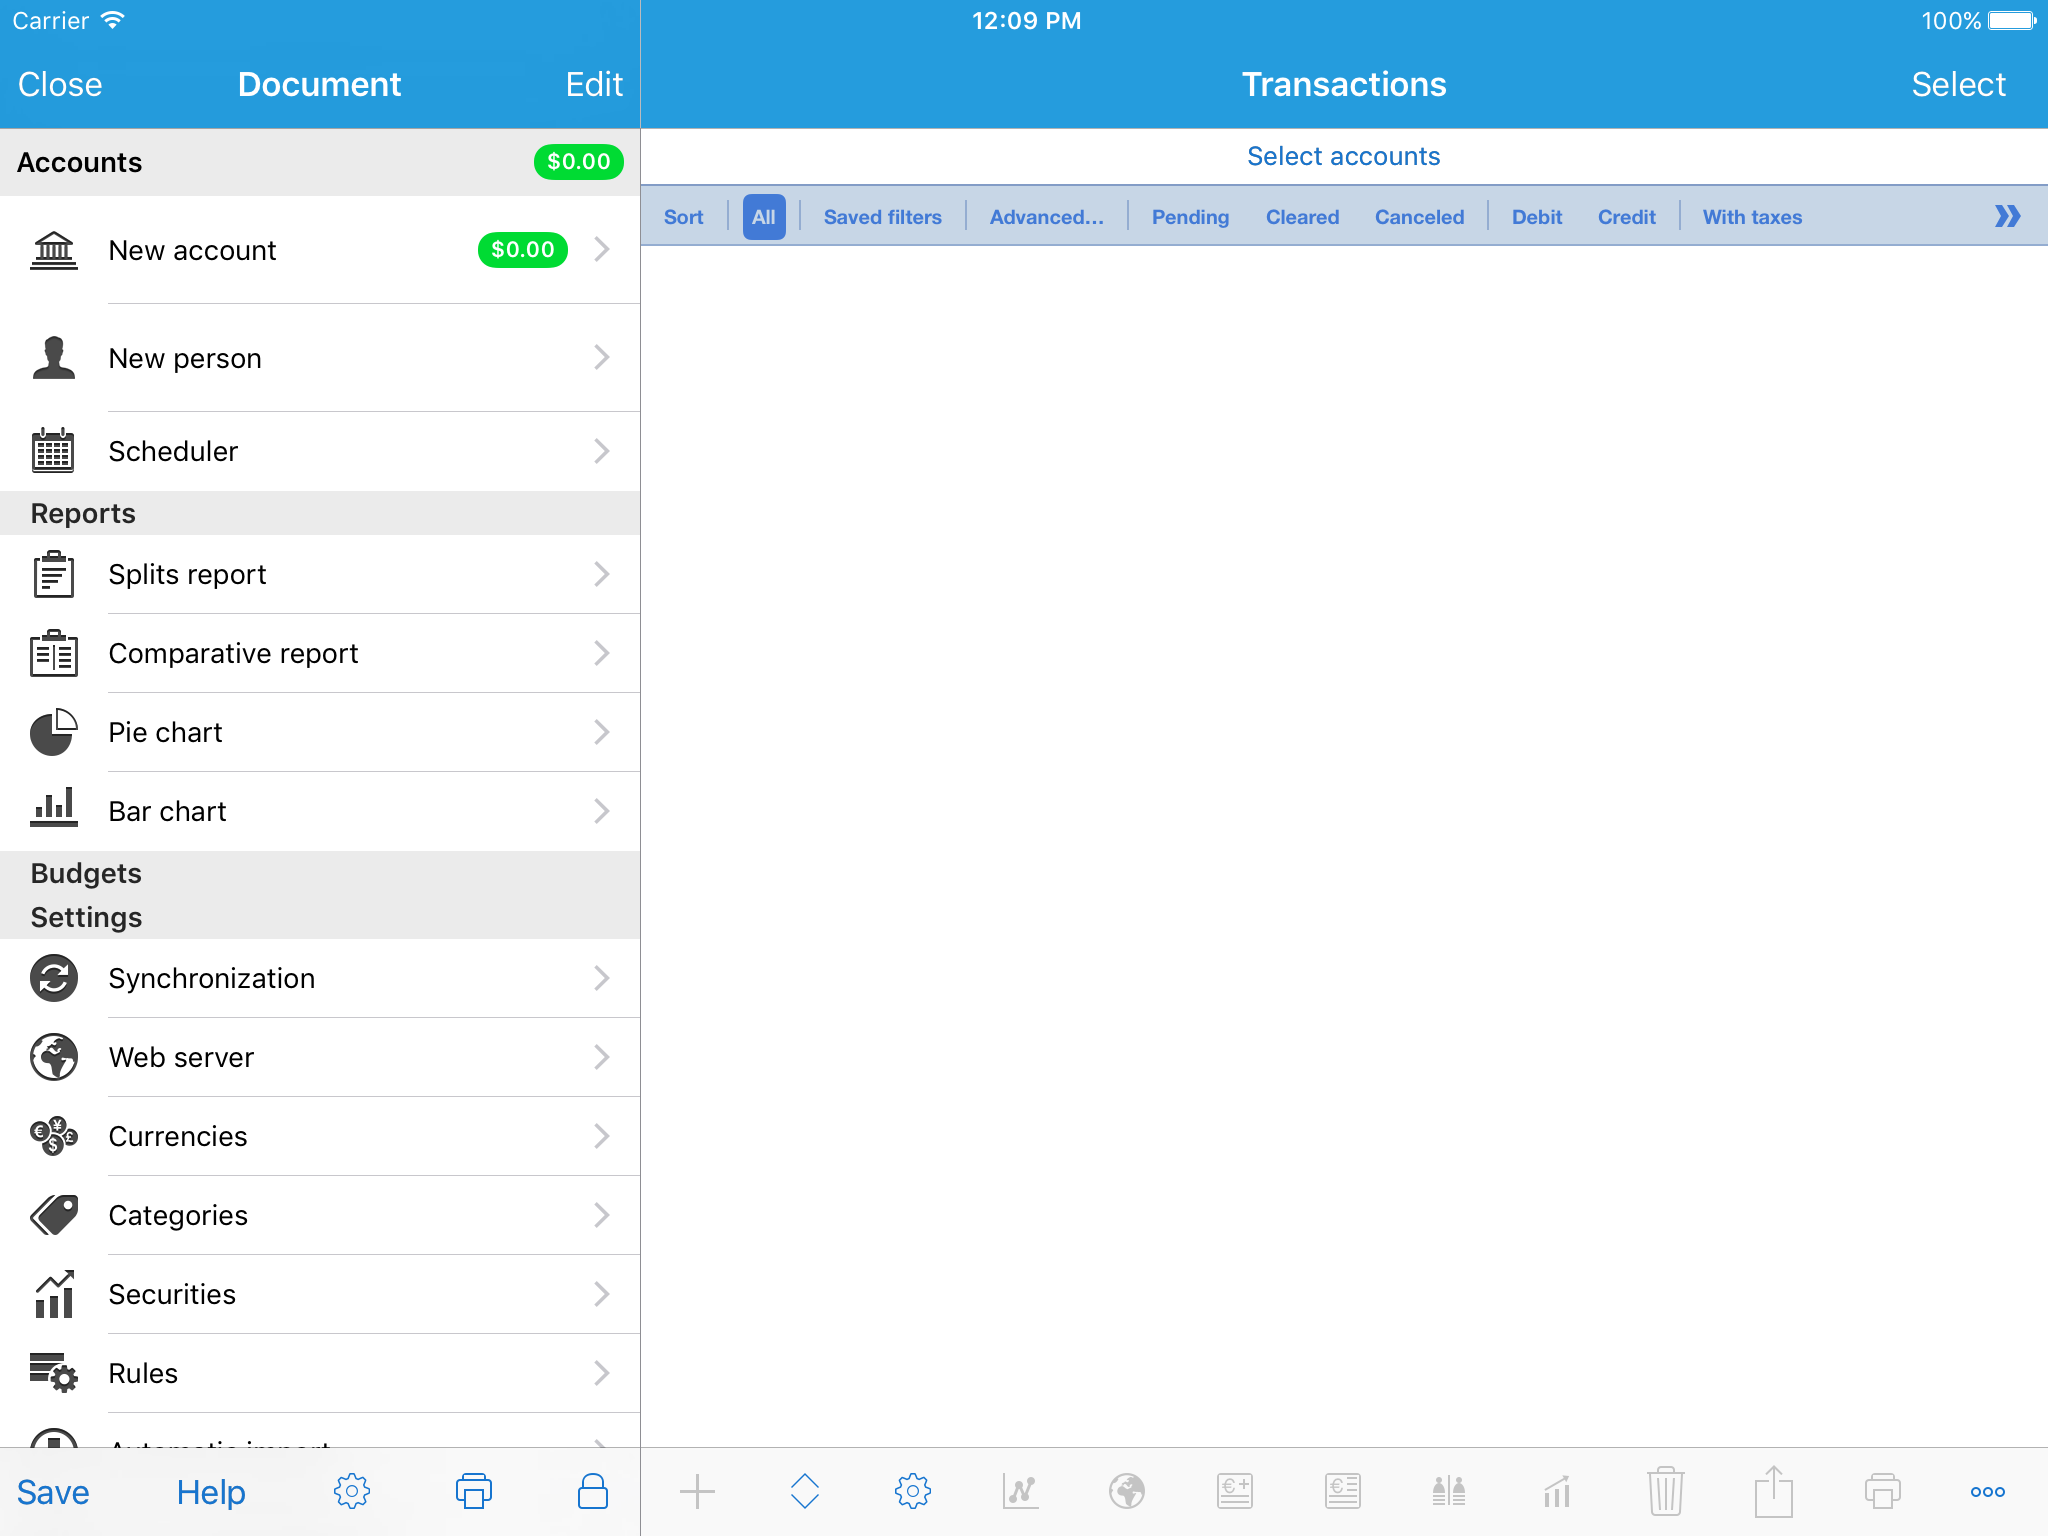
On iPad the list is displayed on the left of the screen in landscape orientation and the right side shows the contents of the selected items in the list. In portrait orientation the list is no more visible by default to free more space for the content and you can make it appear again by touching the back button at the top left of the screen.
Managing accounts
Creating or editing an account
You can create an account by clicking on the edit button in the top right corner of the main list and then by selecting the new account line. When you create a new account, a new window appears to let you edit its properties. If you want to edit an existing account just select its line when the edit mode is on.
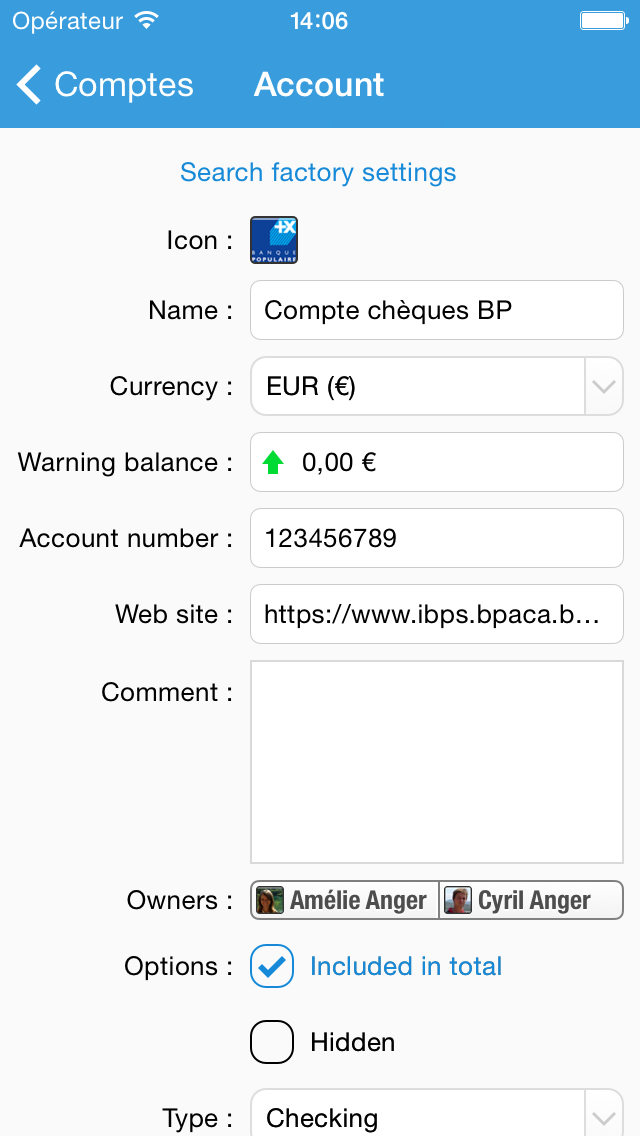
In the account editing window you can change the following properties :
- Icon : touch the existing icon to choose a new image from the photo library.
- Name
- Currency : go here to learn how to add a new currency.
- Warning balance : if the balance of your account goes below this value it will be displayed in red in the transactions list.
- Number : the account number might be used when downloading transactions from your financial institutions in order to automatically find to which account they belong.
- Web site : this is the home page that is displayed when you click on the earth icon below the transactions list.
- Comment : feel free to enter any information you want to remember about your account here.
- Owners : you can define to which people the account belongs to. The owners defined here will be the default owners for each transaction split of the account. Setting owners for accounts and for transaction splits will be useful when you'll make reports. Go here for more information about reports or go here to learn how to create people.
- Included in total : choose whether or not this account is included in the total balance displayed in the bottom left corner.
- Hidden : if you have closed this account and don't want it to be shown in the accounts list you can check this box. If you want to look at its transactions later on you can make it reappear by activating the show hidden items button in the settings of the bottom toolbar of the main list.
- Type : you can specify if it's a checking, credit card, savings, cash, assets, loan or investment account.
You can search for the name of your financial institution with the search button in order to fill the web site and the icon of the account.
Removing an account
You can remove an account with a left swipe on its line or by touching the red - button when the edit mode is on. All transactions in the deleted accounts will be removed, too. If some of the deleted transactions were transfers to other accounts, the linked transactions will remain in their accounts as standard transactions. If you just want to hide this account from the accounts list but still be able to look at it later set it to hidden in the account editing window instead.
Organizing accounts
You can create accounts groups and then move other accounts in them. First, touch the edit button on the top right corner of the main list. To put an account in a group, you have to drag the account under the group (or one of its accounts) when the group is open (the triangle is facing down). You can also reorder accounts by drag & drop.
An account group will display the sum of the balances of its accounts in its own currency.
The accounts list
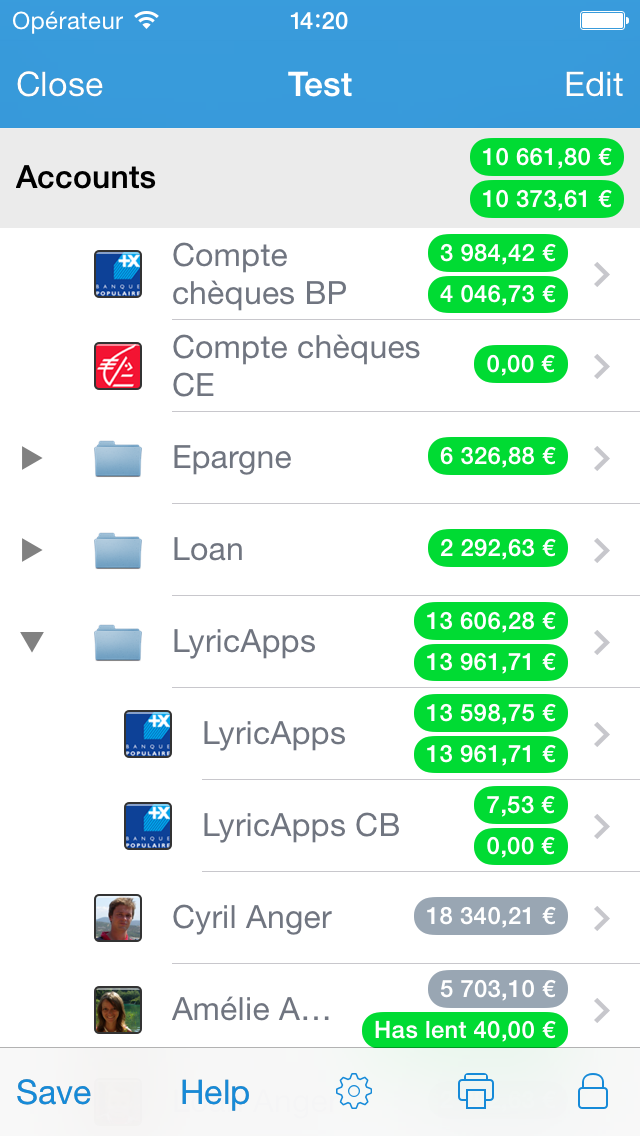
The balance of the account is displayed next to its name in a red or green badge whether it is lower or higher than the warning balance.
If the cleared balance is different than the balance, it will be displayed just underneath. The cleared balance is the sum of all cleared and locked transactions so it is intended to be compared to the balance shown on your financial's institution web site to check that there are no mistakes.
If you enabled professional features you can also choose to display excluded of taxes balance in the settings under the accounts list.
Information on accounts balance
The balance of an account is the sum of all transactions except the ones that are planned (slightly dark background) or canceled. The "Display today's balance" is no longer there like in version 2 because it's now up to you to choose which transactions should be included in the balance as explained below.
When you want to enter transactions you just made, you add them in your accounts and they are included in the balance instantly.
On the opposite when you want to enter future transactions or repetitive transactions, you have to do it in the scheduler now. The occurrences of the transactions in the scheduler are displayed with a slightly darker background in the transactions list (if you activated the show planned transactions checkbox) and thus are not included in the balance of their accounts.
When you want the planned transactions to be included in the balance (the day they should occur for example) you just have to click on the little calendar to turn them into regular transactions. This is done automatically by iCompta if you enable the "Change status of planned transactions" box in the settings of the transactions list.
If you imported a file from version 2 in which you had chosen to create automatically next occurrences 3 months before for example, you may now have a lot of future transactions which are included in the balance because they don't have the "planned" status. In order to avoid that, you can select all these transactions and edit them to modify their status to "planned". Your accounts should have a more logical balance again.
Managing people
In iCompta a person is a special account intended to be used for two purposes : to know who owes what to whom when making shared expenses and to be able to track who is responsible for an expense or income and therefore make reports on who spends the most in the household for example.
Adding or removing people works the same way as adding or removing accounts.
The amount lent or owed by the person is displayed in a badge in the accounts list.
Managing currencies
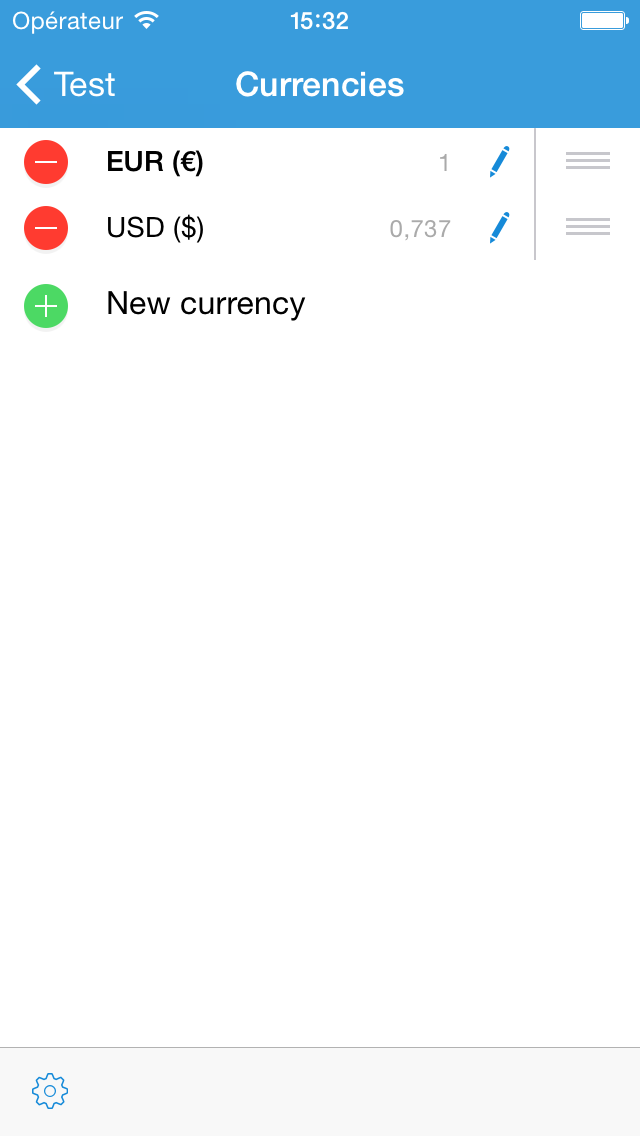
You can add or remove currencies by selecting the currencies line in the main list.
To change the properties of a currency, click on its line.
iCompta can download the latest change rate from Google if you enable it in the settings of the bottom toolbar.
Managing categories
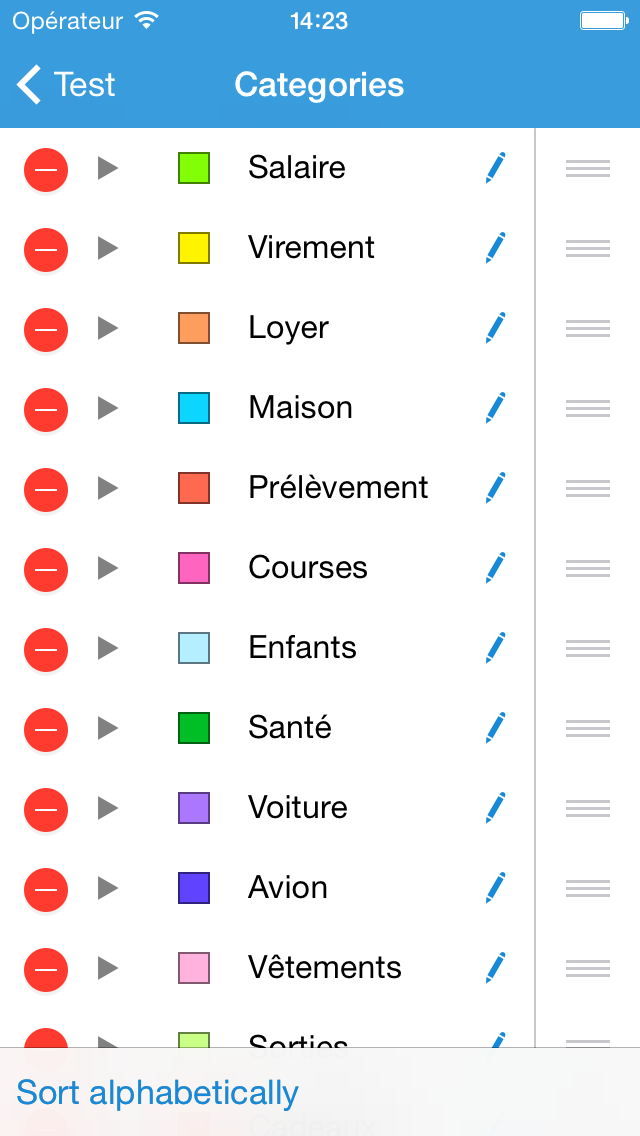
You can add or remove categories by selecting the categories line in the main list.
To change the properties of a category, click on its line.
You can tell whether the category should be used for expense or income or both. This is used when editing the category of a split : it will only show income or expense categories depending on the amount of the split.
To put a subcategory in a category, you have to drag the subcategory under the parent category (or one of its subcategories) when the parent category is open (the triangle is facing down). You can also reorder categories by drag & drop.
Managing transactions
Creating a transaction
You can create a new transaction by clicking on the + button under the transactions list. In the transaction editing screen you can use the + button to create a new transaction quickly. You can also apply rules to the created transaction by clicking on the bottom right button.
Removing a transaction
You can remove a transaction with a left swipe on its line. You can also remove several transactions at once by activating the "Select" mode. If you remove a transfer, the linked transaction will be deleted as well.
Anatomy of a transaction
Properties of a transaction are listed below :
- Account
- Linked account : set an account if you want to make a transfer.
- Name : the names of all other transactions are in the completions list of this field.
When creating a new transaction, setting the name can make a button appear on the right telling that previous transactions with the same name have been found. Touching this button or swiping from the right edge of the screen will display the list of these transactions and you can copy the values of one by selecting it.
 The name field, like all fields with completions in iCompta, takes all the names of existing transactions sorted from the most frequent to the less frequent. This sorting is used to put the most likely completion first in the list. These completions lists are dynamic so if you want to delete or modify a label from a list, you have to modify that label directly in the corresponding transactions. You can use the search field at the top of the transactions list to quickly find the transactions to modify.
 - Status : indicates if the transaction is planned, created, imported, cleared, locked or canceled.
- Date
You can swipe to the right or to the left in the keyboard to change the current month (or the current year with two fingers). To dismiss the keyboard, you can double tap on a date or make a swipe to the bottom.
- Value date : the value date is the same as the date by default.
- Amount
You can directly enter the amount or make some basic math calculations using +, -, *, /, ( and ). On the iPhone you have to make a left swipe in the keyboard to show the operators. You can also type currency symbols and they will be replaced by their current change rate.
Example : (€4 + $3) * 5 will be replaced by €31.50 assuming the currency of the account was €. - Make the sum of splits : tells whether the transaction is considered as the sum of its splits (default case) or the opposite which means the splits are considered as fractions of the transaction.
Generally speaking, you should keep this box checked as it suits most common situations. The other case is useful when you share expenses with people for example and you want to give the amount of the transaction and then spread that amount between the participants with a percentage.
- ET amount : only appears if professional features are enabled.
- Taxes : only appears if professional features are enabled.
- Rate : only appears if professional features are enabled. The tax rates defined in the taxes line of the main list will appear in the completions list of this field.
- Comment : the comments of all other transactions are in the completions list of this field.
- Payee : the payees of all other transactions are in the completions list of this field.
- Type : the types of all other transactions are in the completions list of this field.
- Number : the number of a check for example.
If the account of the transaction is a checking account, the checkbooks you added in the account editing window will appear in the completions list of this field. Then if you select a checkbook in the completions list, it will be replaced by the next check number which will be incremented afterwards.
- Location : shows the place where you created the transaction.
This field is hidden by default, to show it you need to go to the settings under the transactions list and enable geolocation when creating transactions. By enabling it the transactions you previously created in the same place will be suggested like for the name field.
Anatomy of a split
A transaction can be divided into splits. You can add a new split by clicking on the + button on the right of the splits section and you can remove selected splits by clicking on the - button. You can select multiple splits and if you do the fields below will modify all the selected splits at once.
A split has the following properties :
- Amount
- ET amount : only appears if professional features are enabled.
- Taxes : only appears if professional features are enabled.
- Rate : only appears if professional features are enabled. The tax rates defined in the taxes line of the main list will appear in the completions list of this field.
- Taxes category : only appears if professional features are enabled. When you make a taxes report, it is grouped by taxes category.
- Ratio : you can set a percentage of the amount of the transaction when "Make the sum of splits" is not checked.
- Linked account : set an account if you want to make a transfer.
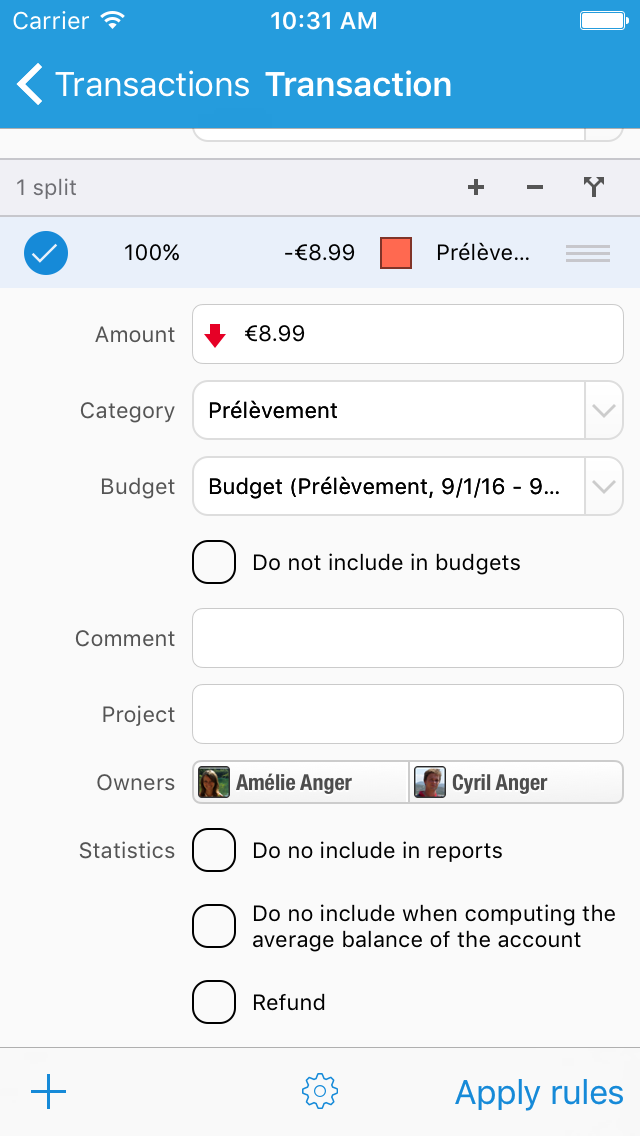
- Category
- Budget : iCompta automatically choose a budget period but you can change it if you want the split to be affected to a different budget or to the previous or next month for example. You can also indicate not to include the split in any budget.
- Comment : the comments of all other splits are in the completions list of this field.
- Project : the projects of all other splits are in the completions list of this field. You can tag everything related to a project in here, for example "Building the house". By doing so and also setting categories, you will be able to make a report and know exactly how much you spent in the various categories when building your house.
- Owners : you can tell who spends money for example. If you use this field, you will be able to know who has spent money and how much for a given category for example.
- Invoice : only appears if professional features are enabled. Allows you to monitor if the invoices have been paid.
- Do not include in reports
- Do not include when computing the average balance of the account : used by the balance evolution view.
- Refund : if your health insurance company made you a refund you can check this box so that the amount will be deduced from the health expense instead of being added to health income.
Entering a new transaction
When you create a new transaction by touching the + button, the fast entry screen appears by default. This is a light version of the transaction editing screen with main fields only in order to accelerate entry as much as possible. This light editor doesn't offer all possibilities of the standard editor (it's not possible to enter multiple splits for example) but you can switch to the standard editor at any time by touching the "Advanced" button. If you prefer to have the standard editor by default when creating new transactions, you can do so by going in the settings under the transactions list.
Here is a tutorial which explains how to enter a new transaction in iCompta :
- Example : you went to the supermarket and paid $100.
- The fast entry screen appears with the amount field already focused so you start by typing the amount : 100.
- Then you type the name of the transaction : Supermarket for example.
- If you already created "Supermarket" transactions before, a blue button appears and you can swipe from the right edge of the screen to show the previous transactions and select one to copy its values.
- You move to the payee field to enter the name of the supermarket for example.
- Then you can enter the mean of payment in the type field : Credit card, Cash or Check for example.
- If you paid by check you can enter the number of the check in the number field or just select your checkbook in the drop-down menu (if you already added it in the account editing window before) for the number to be automatically inserted.
- Below, you can then choose the Food category for example.
- Last, you can modify the date in the top left corner if necessary.
- Example : let's carry on with the example above but this time let's suppose that only part of the expense was for food and that you spent $20 for leisure.
- As you can't enter multiple splits in the light editor you need to switch to the standard editor by touching the "Advanced" button.
- Then you move to the amount field of the split to enter the new amount : 80.
- You notice that the amount of the transaction has also changed to $80.
- Then you create a new split by clicking the + button next to "1 split" and you choose the Leisure category.
- You type the amount of the new split : 20.
- You check that the amount of the transaction is back to $100 : everything is fine.
- This way of proceeding is a little bit redundant since we have to type the amount twice with the risk a making a mistake. So instead of the previous steps you can just click on the button with 2 arrows splitting and choose Leisure category.
Editing several transactions at once
You can select several transactions by activating the "Select" mode in the top right corner and by clicking on "Edit" when the selection is done. The properties you modify will affect all the selected transactions at once.
You can also assign a category to one or more transactions quickly by activating the "Select" mode and then clicking on "Other action" and finally "Set category".
Transfers
To create a transfer, you just need to create a transaction and set the linked account in the "Transfer to" field. The linked transaction will automatically be created in the other account. When you edit the amount of a split in a transfer you will be asked if you want to modify the linked split as well.
If you have existing transactions that should be a transfer you can select them in the transactions list with the "Select" mode and then click on "Other action" and "Convert as transfer". You will then have to choose a split from the first transaction to link with a split from the second transaction.
Removing old transactions
If you want to remove some old transactions to clean your accounts you can touch the trash button (… button then "Remove old transactions" on iPhone). A new single transaction with the sum of all the categories of the removed transactions will be created.
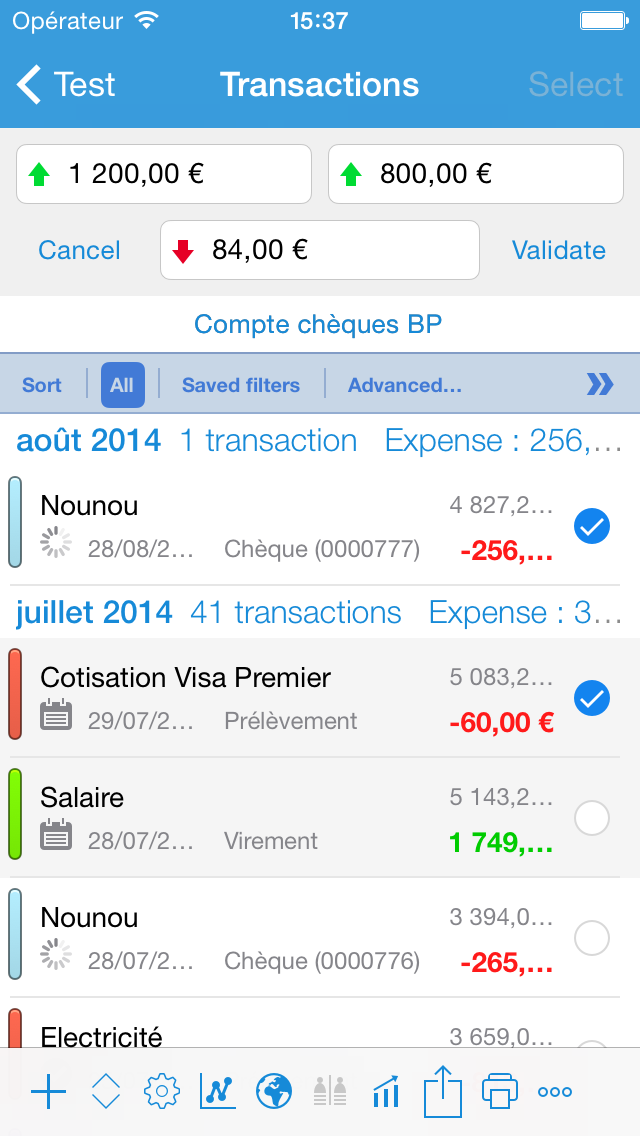
The transactions list
You can click on the account name on the top to select one or more accounts to display.
You can change how the transactions are sorted by clicking on the sort button in the blue bar above the transactions list.
You can choose which transactions should be shown by selecting different filters in that blue bar. You can also make a custom filter by clicking on the advanced button. Clicking on the "All" button resets all the active filters. The filters only apply to transactions by default but you can also decide to make the categories and people filters to also apply on splits in the settings of the bottom toolbar.
The first two rows of columns represents the transactions properties and the third row the splits properties.
You can choose to show the names of the columns in the settings of the bottom toolbar. You can resize the different columns by moving the separators between them. You can reorder the columns and choose to hide some if you don't use them by keeping your finger on the columns bar.
When several transactions occur on the same day you can reorder them by drag & drop by clicking on the 2nd item of the bottom toolbar. In order to do that you must have added the 'Manual ordering by drag & drop' sort criterion (after 'Date' or 'Value date') before.
You can highlight transactions with a color by activating the "Select" mode and then clicking on "Other action" and finally "Change highlight color".
You can print the transactions by touching the print button in the bottom toolbar. Only the transactions that are currently displayed will be printed so you can use the filters bar to exactly choose what will be printed. You can choose to print transactions and/or splits in the window that appears.
Customizing the display
If you find that you don't need all the fields available for transactions and splits, you can hide some to make the display more clear. You can modify the columns displayed in the transactions list by making a long touch on the columns bar and you can modify the fields displayed in the transactions editing window by touching the star wheel in the bottom.
Preview computation mode
You can change the way the preview column is computed in the settings of the bottom toolbar.
There are 3 different modes :
- Add filtered transactions first and then add displayed transactions.
- Add filtered transactions and displayed transactions in order.
- Add displayed transactions only.
- Example : let's consider the following transactions sorted by date.
- Name : Transaction 4
Date : 01/04/2014
Amount : $-40
Status : Pending - Name : Transaction 3
Date : 01/03/2014
Amount : $-30
Status : Validated - Name : Transaction 2
Date : 01/02/2014
Amount : $-20
Status : Pending - Name : Transaction 1
Date : 01/01/2014
Amount : $-10
Status : Validated
The computation mode only makes a difference when there is an active filter which hides some transactions otherwise the preview will be the same in the 3 modes.
- Example : let's consider the previous transactions with the "Pending" filter on which hides transactions 1 and 3.
- Add filtered transactions first and then add displayed transactions :
Preview is computed in the order 1 > 3 > 2 > 4.
Transaction 4 : $-100
Transaction 2 : $-60
(Transaction 3 : $-40)
(Transaction 1 : $-10) - Add filtered transactions and displayed transactions in order :
Preview is computed in the order 1 > 2 > 3 > 4.
Transaction 4 : $-100
(Transaction 3 : $-60)
Transaction 2 : $-30
(Transaction 1 : $-10) - Add displayed transactions only :
Preview is computed in the order 2 > 4.
Transaction 4 : $-60
Transaction 2 : $-20
Using the scheduler
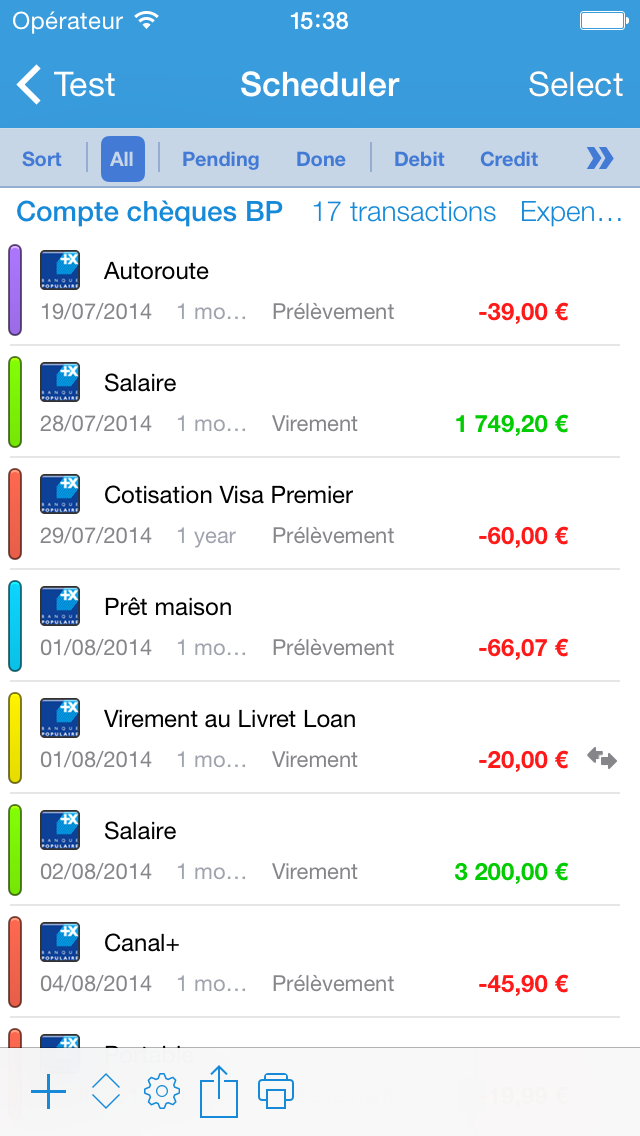
The scheduler is the place to add repeating transactions or transactions that are planned to occur at a later date.
Creating a scheduled transaction works the same way as creating a standard transaction except there are more fields available :
- Frequency : tells when the transaction is repeated. You can give a duration in days, weeks, months or years. Leave it blank if the transaction doesn't repeat.
- Occurrences : when the transaction has a frequency, tells the number of times the transaction repeats. Leave it blank if the transaction repeats indefinitely.
- Ending date : when the transaction has a frequency, tells the date of the last occurrence. Leave it blank if the transaction repeats indefinitely.
Showing planned transactions
You can display the occurrences of scheduled transactions in the transactions list of their accounts by checking the "Show planned transactions" box in the settings of the bottom toolbar of the transactions list. Unlike version 2 of iCompta, you don't have to tell when to create automatically the next occurrence of a repeating transaction (a week before, at the start of the month, etc.). Instead, you just have to set the date until which you want to see all planned transactions.
In the settings of the transactions list, you can tell iCompta to update this date automatically to the current date or the end of the (week | month | year) plus a given duration.
It is important to know the difference between modifying a scheduled transaction (in the scheduler) and one or several occurrences (in the transactions list) : if you modify a property of a scheduled transaction the change will be propagated to the same property of all planned occurrences whereas a change to an occurrence is limited to that occurrence. This also applies to removal : if you delete a scheduled transaction it will delete all of its planned occurrences as well but you can just delete one occurrence.
An occurrence of a scheduled transaction can be easily recognized as it's displayed with a gray background in the transactions list. You can click on the little calendar icon of a planned occurrence to turn it into a regular transaction. From now on it won't be affected by any change to the scheduled transaction and it will be included in the account balance.
In the settings of the transactions list, you can tell iCompta to change the status of planned transactions automatically on their due date in order to turn them into regular transactions.
Please note that this setting doesn't apply to credit cards transfers and budgets previsions so that they can be computed again if you enter your transactions a fews days later.
Using credit card accounts
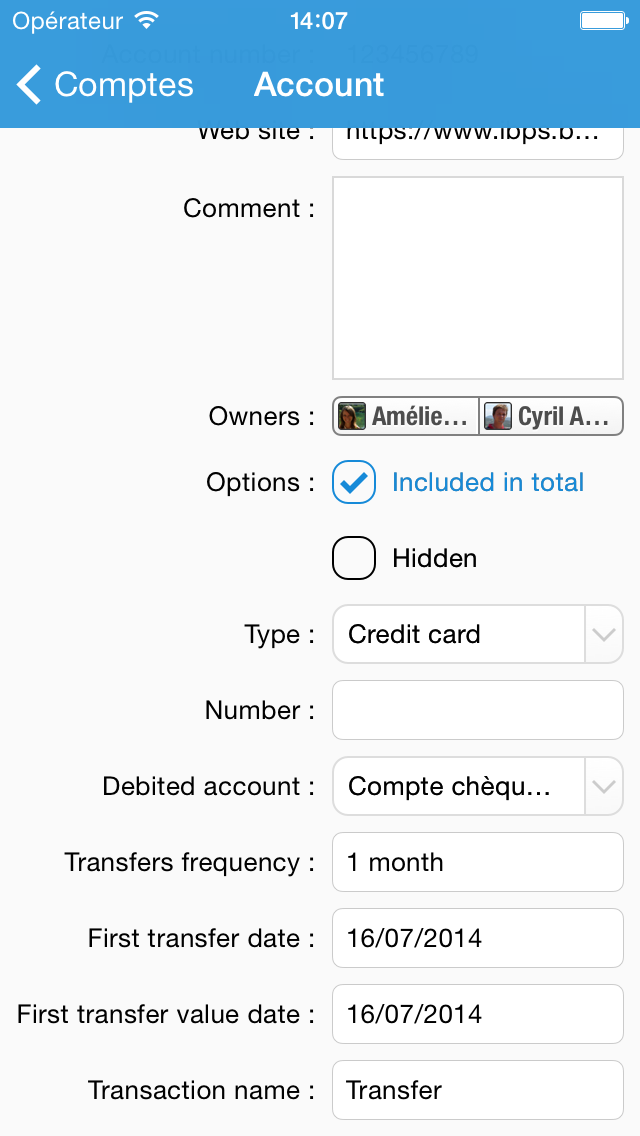
You can create a credit card account to have iCompta create transfers to a main account on a periodic basis. In the account editing window set the debited account and transfers frequency and iCompta will automatically compute the balance of all transactions since the previous transfer and create a new transfer between the two accounts.
- Example : you have a credit card that stops the ongoing balance on the 20th of each month and then withdraw it on your main account on the 26th.
- Set the transfers frequency to 1 month.
- Set the first transfer date to 01/20/2013.
- Set the first transfer value date to 01/26/2013.
- If you create a transaction with the date 01/19/2013 it will be included in the transfer on 01/20/2013.
- If you create a transaction with the date 01/20/2013 it will be included in the transfer on 02/20/2013.
- Please note that this is the value date of the transaction that is used to determine in which transfer the transaction is included. So if you create a transaction with the date 01/19/2013 but you notice that your financial institution didn't include it in the January withdraw you can change its value date to 01/20/2013 so that iCompta will include it in the transfer on 02/20/2013 as well.
Using savings accounts
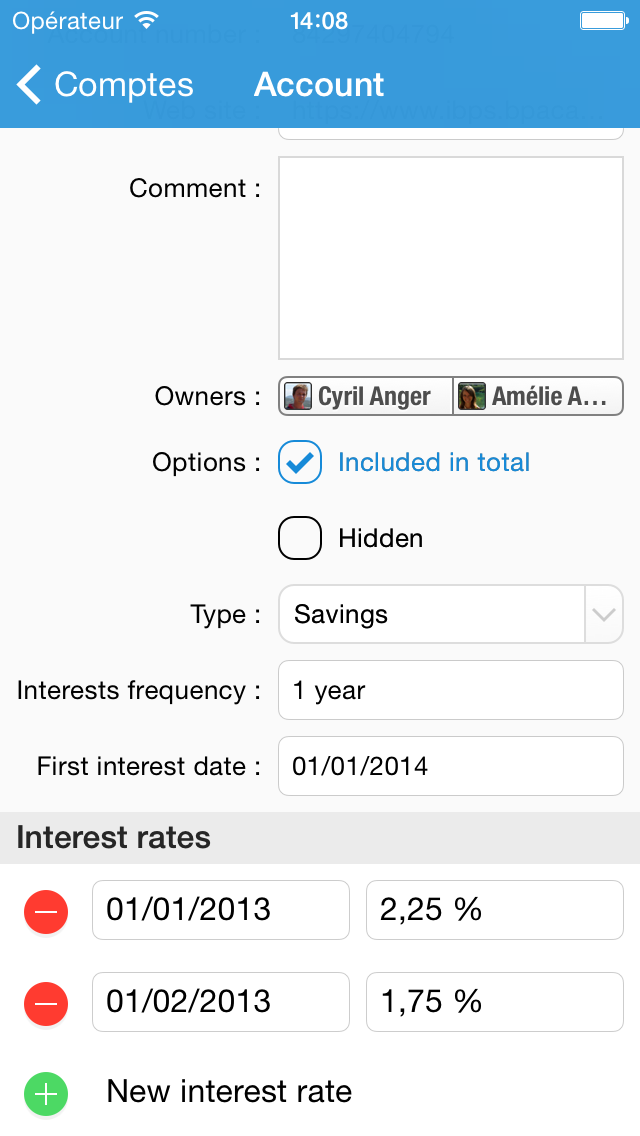
You can create a savings account to have iCompta compute the approximate interests you will earn. In the account editing window you have to set the interests frequency and add the different rates and the date when they become effective. When your financial institution pays your interests, you can click on the little calendar icon of the transaction computed by iCompta to turn it into a regular transaction so that you will be able to change its amount to the real one.
Managing loans
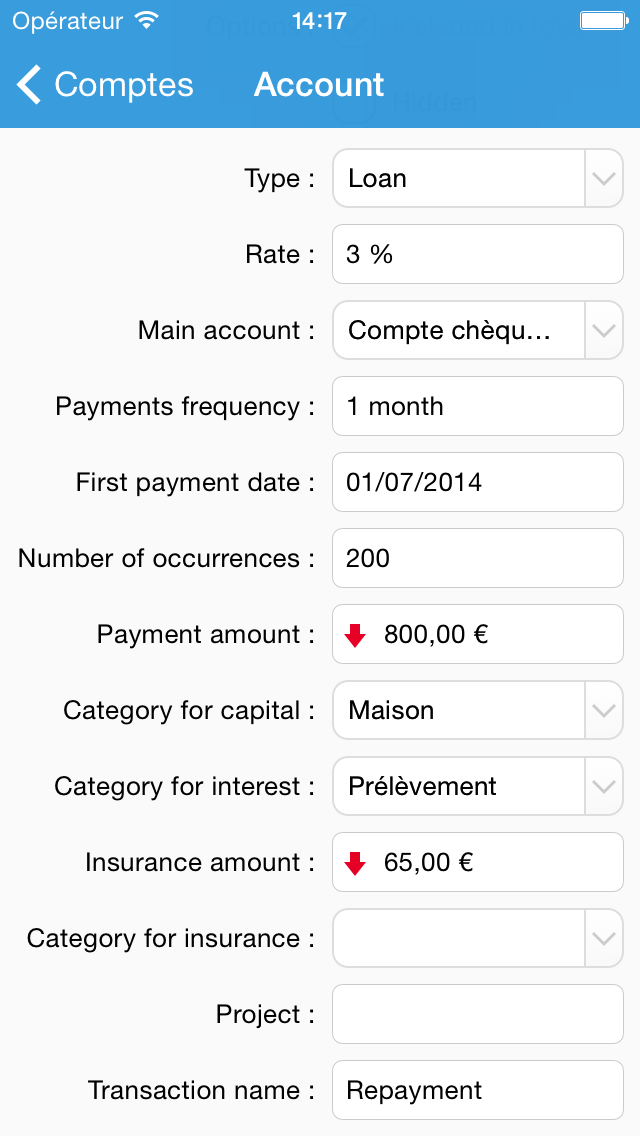
You can create a loan account if you want to know how much capital you still have to pay back and how much interest and insurance you have paid for example. In the account editing window you can enter the amount of the loan, its rate (don't include the insurance in it) and the amount of the insurance that will be added to each payment. iCompta will then automatically create transfers between the loan account and the main account.
- Example : you contracted a 20-year loan for building your house and you pay for it every month.
- Set the amount to 200 000.
- Set the main account to your standard checking account.
- Set the rate to 3 %.
- Set the payments frequency to 1 month.
- Set the first payment date to 01/01/2013.
- Set the number of occurrences to 240.
- iCompta automatically computes the amount to pay every month : 1,109.20 (it doesn't include insurance).
- Set the categories for capital, interest and insurance (you should create some for that matter if you haven't already done it so that you can easily monitor how much interest and insurance you have paid for example).
- Set the insurance amount a month to 50.
- iCompta automatically creates a simple 200 000 transaction in the loan account but if in fact the financial institution has made one or several transfers to your main account, you can delete this transaction and instead create transfers between your main account and the loan account.
The important thing to remember is that the balance of a loan account is the capital left to be paid.
If a real monthly payment differs from the one computed by iCompta you can click on the little calendar icon of the transaction to turn it into a standard transaction and then edit it so that it matches reality. This might be the case if you have to pay interim interest during the building of your house. If the financial institution adds the interim interest to the amount of the loan when the house is built, you just create a new transaction with that extra amount in the loan account.
- Example : you renegotiate the rate of your loan with your financial institution.
- Make sure to transform all previous payments to standard transactions by changing their status from planned to created. This way the previous payments will remain unaffected and only the future ones will be updated to reflect the new settings of the loan.
- Go in the account editing screen and change the rate to 2,5 %.
- iCompta will automatically recalculate future monthly payments.
- Example : you change the amount of your monthly payment.
- Make sure to transform all previous payments to standard transactions by changing their status from planned to created. This way the previous payments will remain unaffected and only the future ones will be updated to reflect the new settings of the loan.
- Go in the account editing screen and change the payment amount to the new value.
- iCompta will automatically modify the number of occurrences and recalculate future monthly payments.
Downloading transactions from your financial institutions
Automatic download setup
If you wish, you can download your transactions automatically from your financial institutions by purchasing an optional subscription.
List of supported financial institutions for automatic downloading
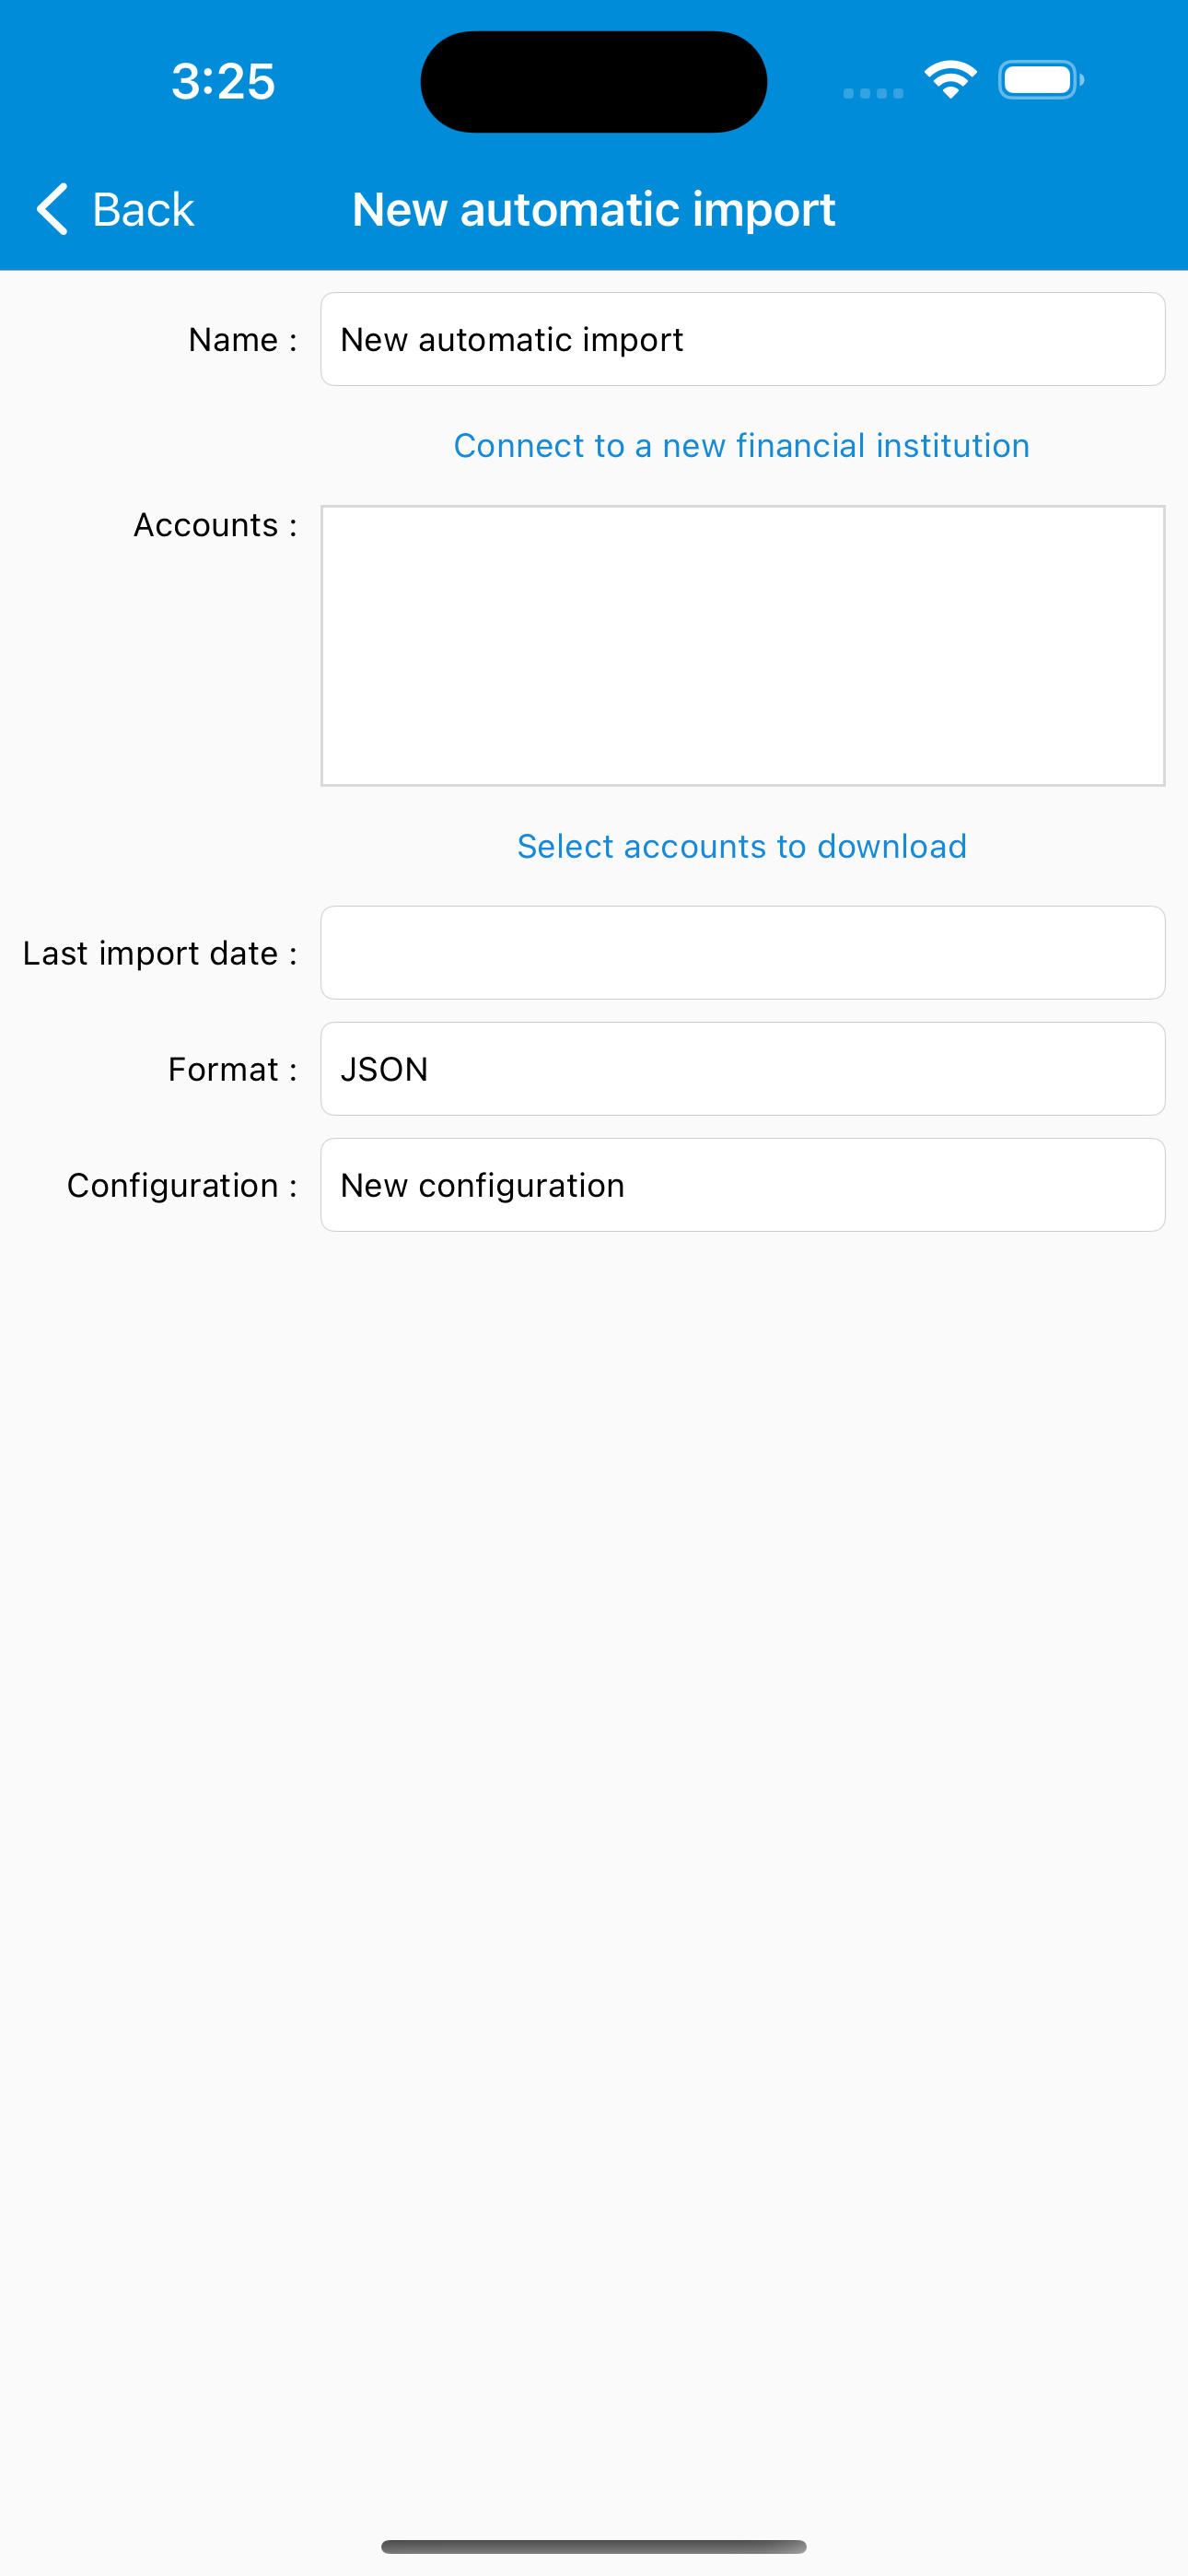
Once the subscription is active, you can click on the "Automatic import" line in the main list and then click on the "Automatic download" line with a green plus sign to create an automatic download configuration. When you select the automatic download configuration, you must first connect your financial institutions with the "Connect to a new financial institution" button and then optionally choose the accounts you want to download with the "Select accounts to download" button (you can leave the "Accounts" field empty to download all your accounts).
Launching automatic import
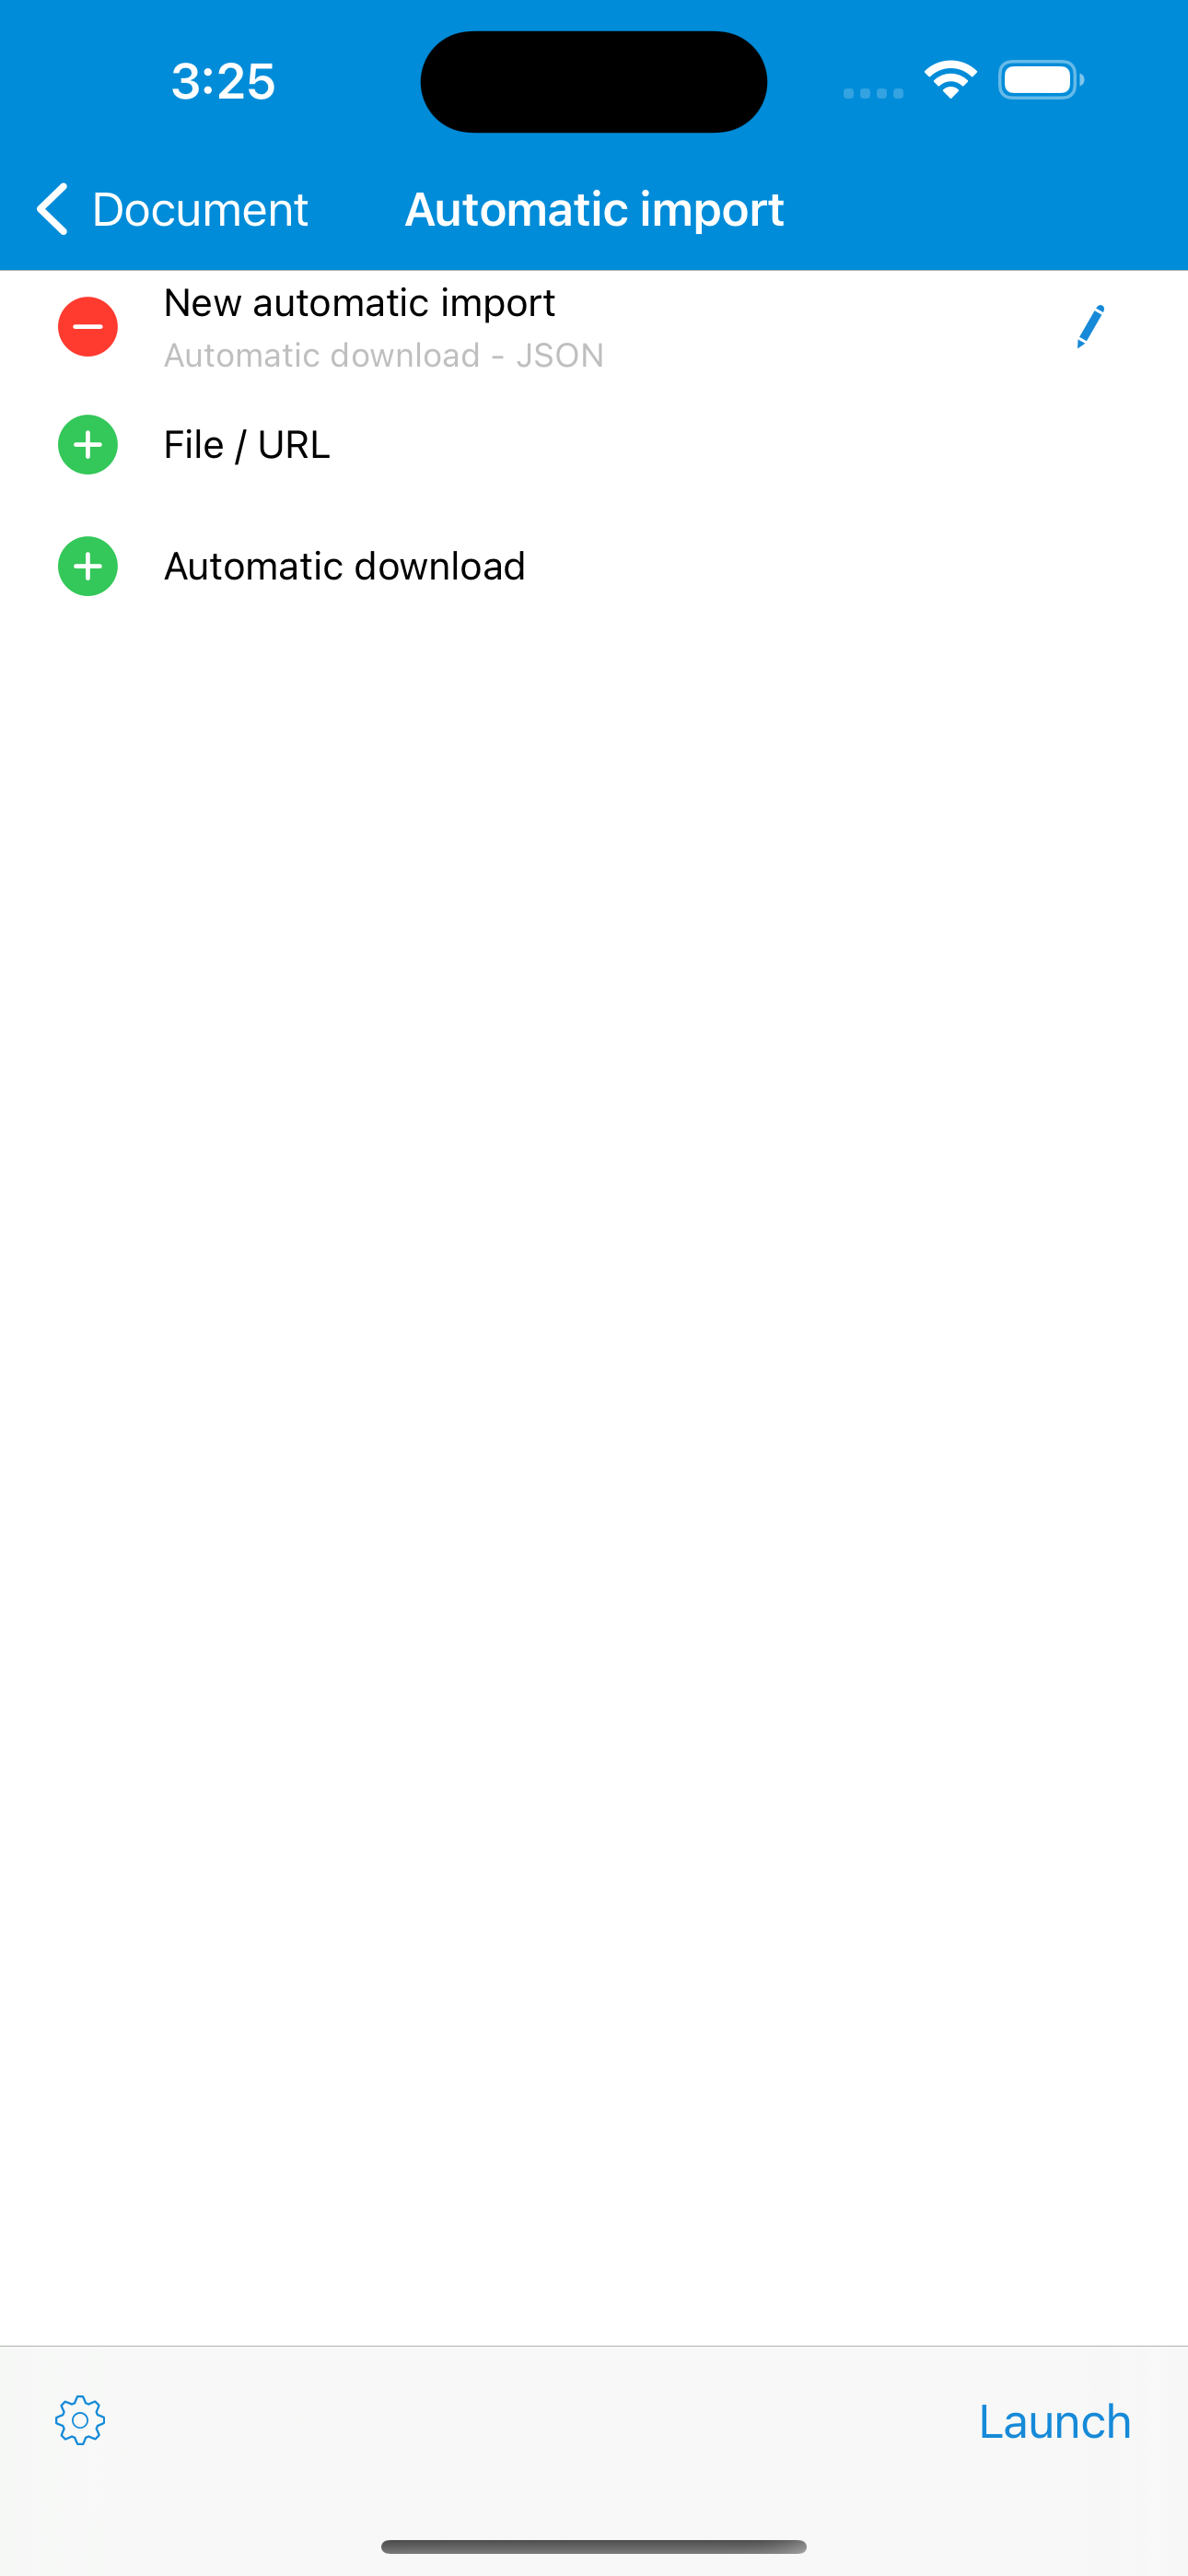
If you have set up automatic import configurations you can launch them using the button in the bottom toolbar. You can also automatically launch automatic import when opening the document by enabling the option in the settings of the bottom toolbar.
Downloading from your financial institution's web site
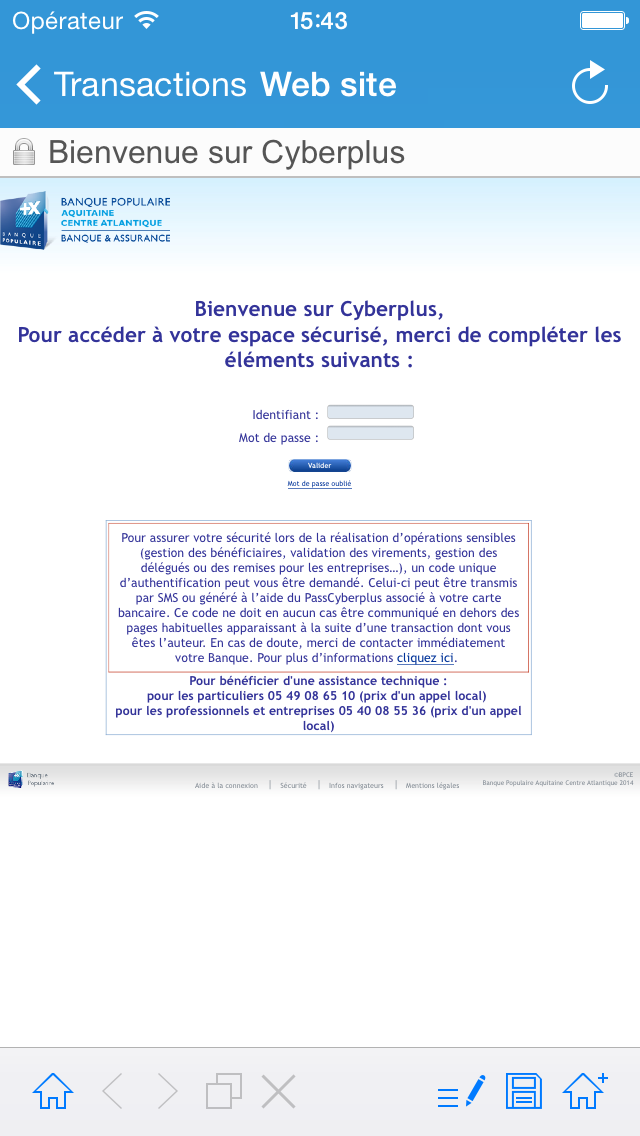
Assuming you entered the financial institution's web site in the account editing window, you can click on the earth icon under the transactions list to show the integrated web browser. You can save your login and password in the system keychain using the last but one button in the bottom toolbar if you don't want to type them every time. If you do so, the next time you can just click on the pencil button to fill in the login form automatically. Then you have to navigate to the download page of your financial institution's web site and download a file. iCompta will automatically open an import dialog when the file is downloaded.
The embedded web server
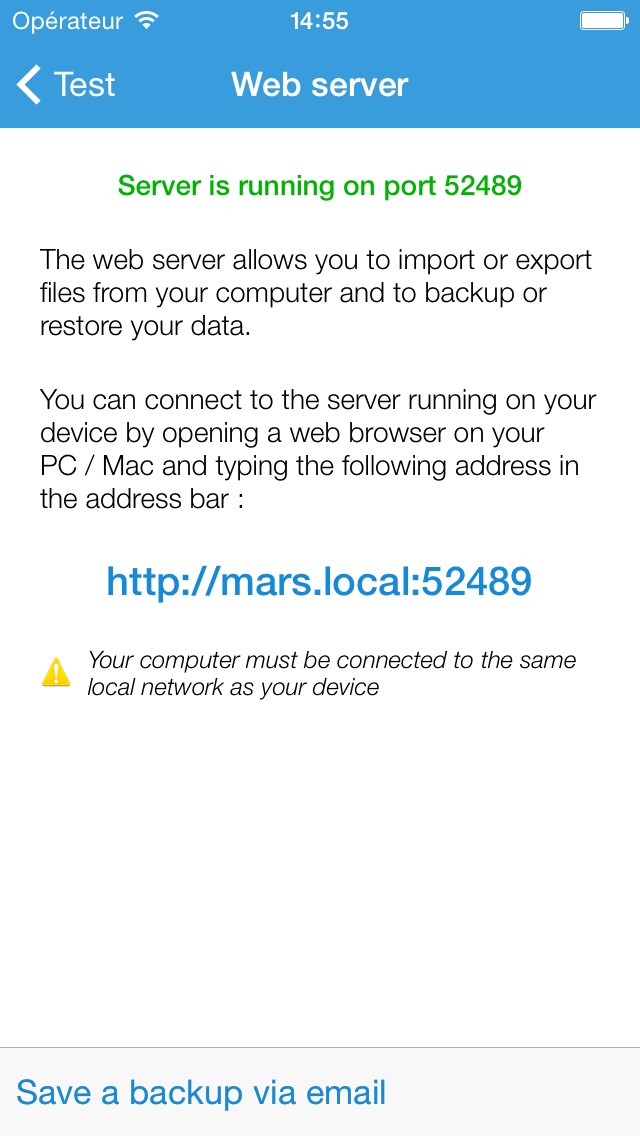
The embedded web server allows you to import or export files from your computer and to backup or restore your data. To launch it just select the web server line in the main list and then open a web browser on your PC / Mac and finally type the written address in the address bar. An Alert will appear in iCompta to authorize the connection.
If you can't connect to your iPhone / iPad, please check that it's connected to the same local network as your PC / Mac. If it is then you should reboot your DSL box or WiFi router before trying again.
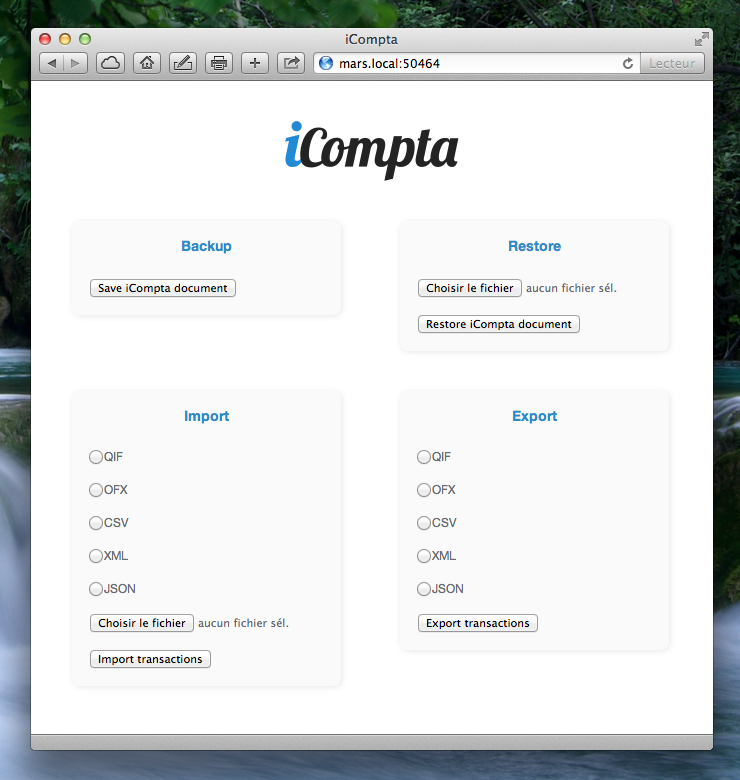
Importing your data
You can import transactions from a QIF, OFX, CSV, XML or JSON file. To do so you can either use the embedded web server or perform an "Open in…" from another application like Mail or Dropbox for example.
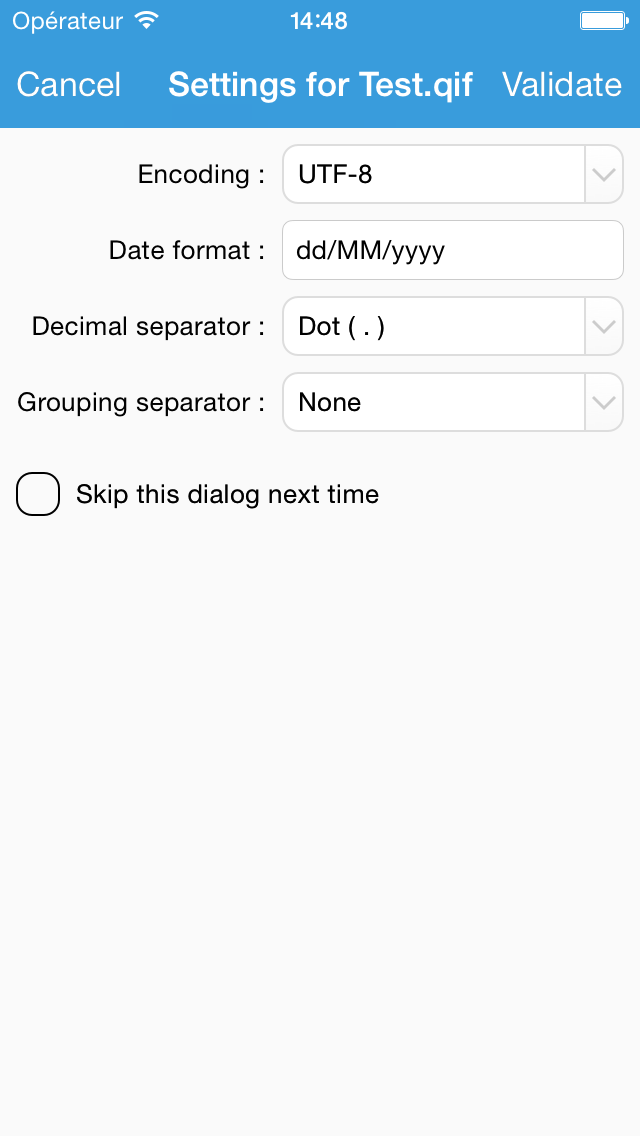
Settings
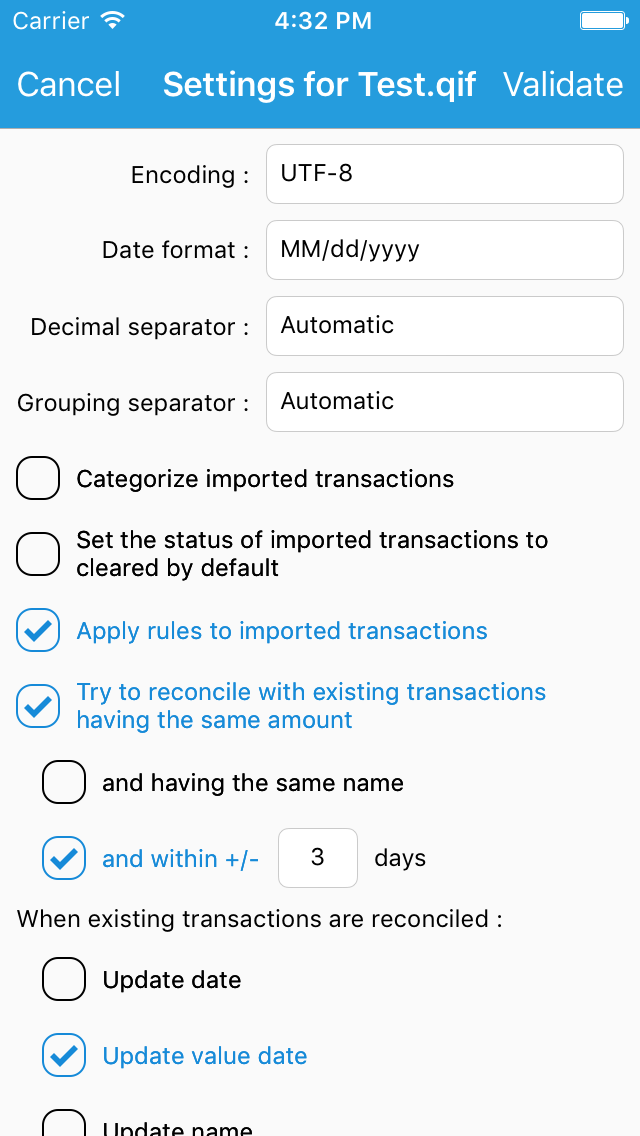
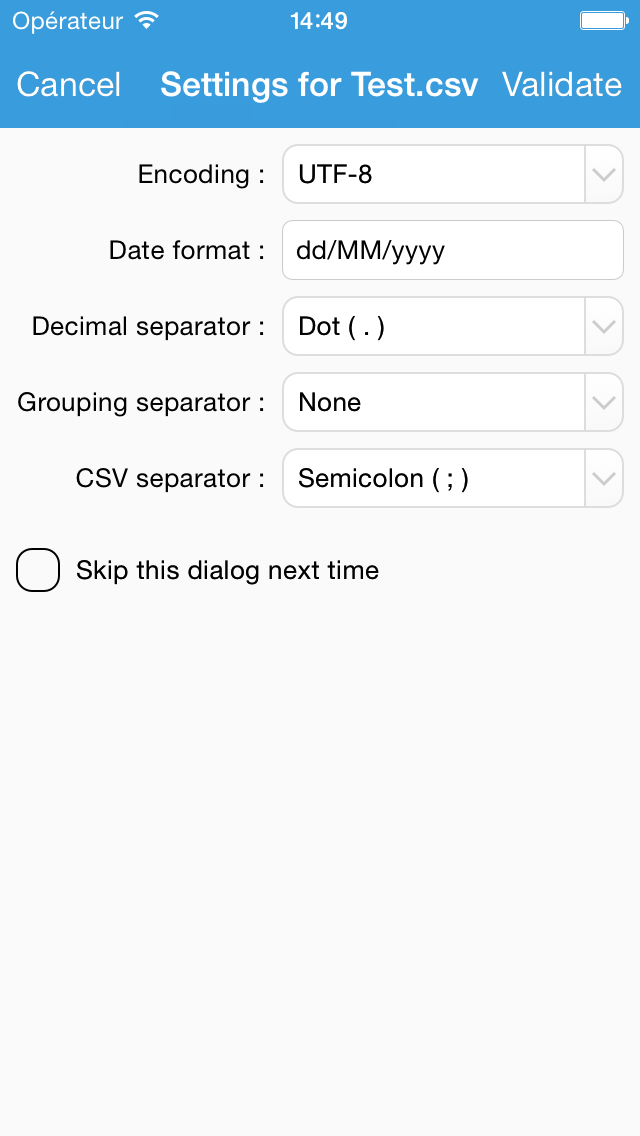
The settings screen will appear next to let you edit the following properties :
- Encoding
- Date format : use yy or yyyy for the year, MM for the month and dd for the day. The date format is case sensitive so make sure to enter MM and not mm. For example if a date in your file is 02/24/2012 you have to set the date format to MM/dd/yyyy.
The date format for importing a Microsoft Money QIF file is dd/MM''yyyy (with two ' and not one "). - Decimal separator : choose automatic to let iCompta guess it.
- Grouping separator : choose automatic to let iCompta guess it.
- Categorize imported transactions : if you enable this iCompta will search previous transactions with the same name and automatically assign the same category.
- Set the status of imported transactions to cleared by default : if you enable this imported transactions will have the cleared status instead of imported.
- Apply rules to imported transactions
- Try to reconcile with existing transactions : if you enable this iCompta will try to find if an imported transaction doesn't already exist to mark it as reconciled or ignored.
- When existing transactions are reconciled : you can tell which fields to update.
CSV settings
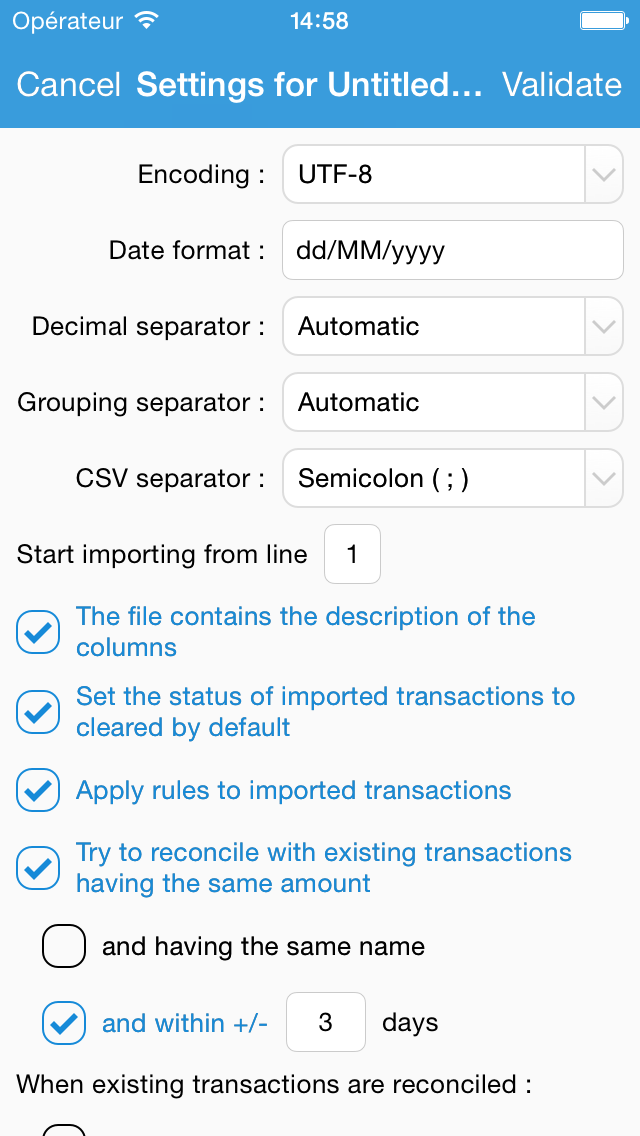
- CSV separator
- Start importing from line : indicate the first line where the actual data begin.
- The file contains the description of the columns : check this if the first line of the data is an header line with the description of the columns.
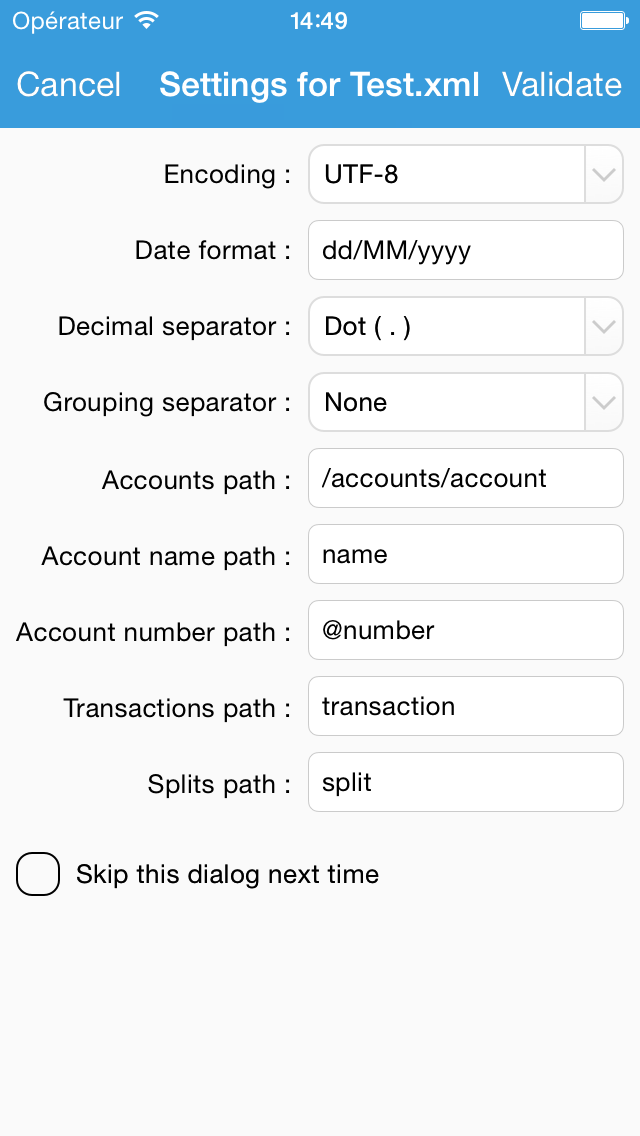
XML settings
Example 1
<accounts>
<account>
<name>Account 1</name>
<number>123456</number>
<transactions>
<transaction>
...
<splits>
<split>
...
</split>
<split>
...
</split>
</splits>
</transaction>
</transactions>
</account>
</accounts>
Example 2
<account name='Account 1' number='123456'>
<transaction>
...
<split>
...
</split>
<split>
...
</split>
</transaction>
</account>
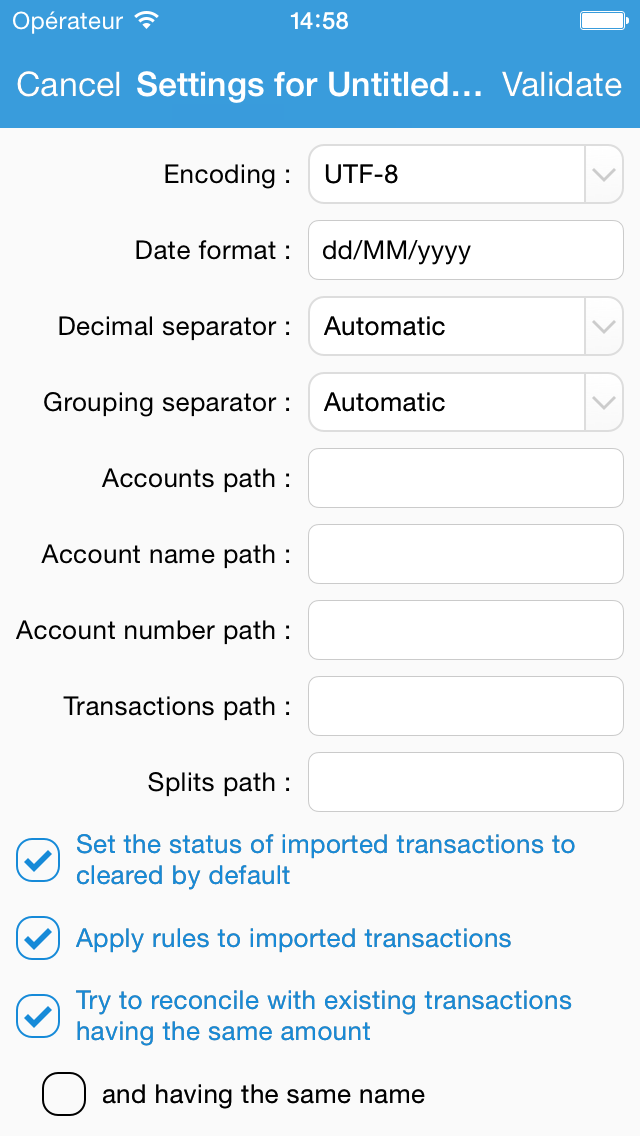
- Accounts path : enter the path to access the accounts nodes from the root node.
Example 1 : you have to enter /accounts/account.
Example 2 : you have to enter /account. - Account name path : enter the path to access the name from an account node. Leave it empty if the file doesn't contain account names.
Example 1 : you have to enter name.
Example 2 : you have to enter @name. - Account number path : enter the path to access the number from an account node. Leave it empty if the file doesn't contain account numbers.
Example 1 : you have to enter number.
Example 2 : you have to enter @number. - Transactions path : enter the path to access the transactions nodes from an account node.
Example 1 : you have to enter transactions/transaction.
Example 2 : you have to enter transaction. - Splits path : enter the path to access the splits nodes from a transaction node. Leave it empty if the file doesn't contain splits.
Example 1 : you have to enter splits/split.
Example 2 : you have to enter split.
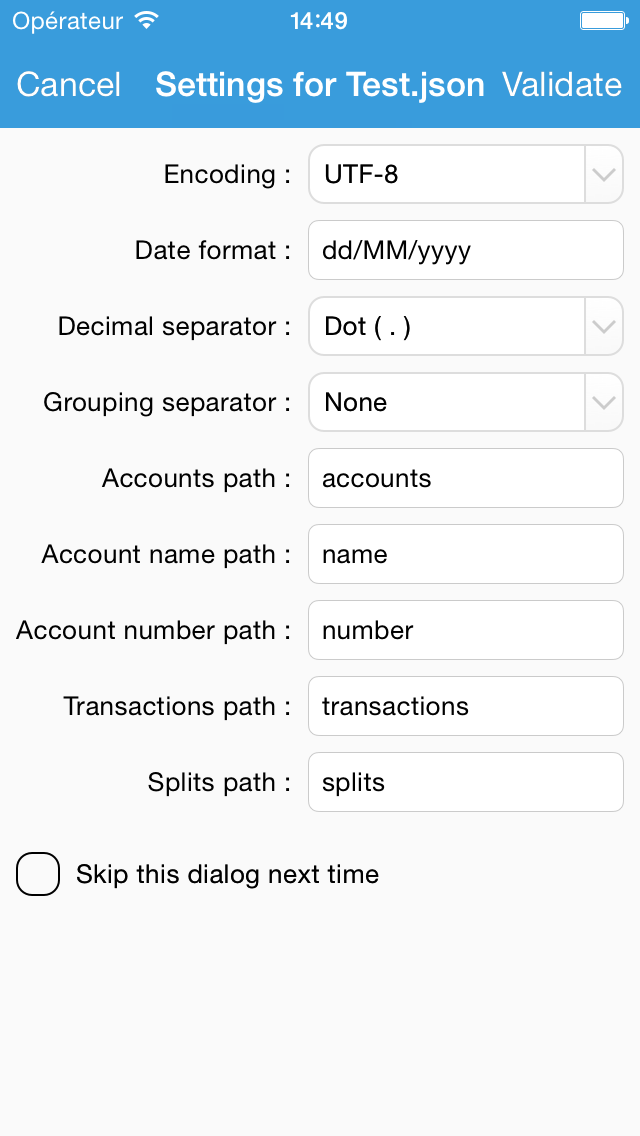
JSON settings

Example
{
"accounts": [
{
"name": "Account 1",
"number": "123456",
"transactions": [
{
...
"splits": [
{
...
}
]
}
]
}
]
}
- Accounts path : enter the path to access the accounts array from the root object.
Example : you have to enter accounts. - Account name path : enter the path to access the name from an account object. Leave it empty if the file doesn't contain account names.
Example : you have to enter name. - Account number path : enter the path to access the number from an account object. Leave it empty if the file doesn't contain account numbers.
Example : you have to enter number. - Transactions path : enter the path to access the transactions array from an account object.
Example : you have to enter transactions. - Splits path : enter the path to access the splits array from a transaction object. Leave it empty if the file doesn't contain splits.
Example : you have to enter splits.
Mapping
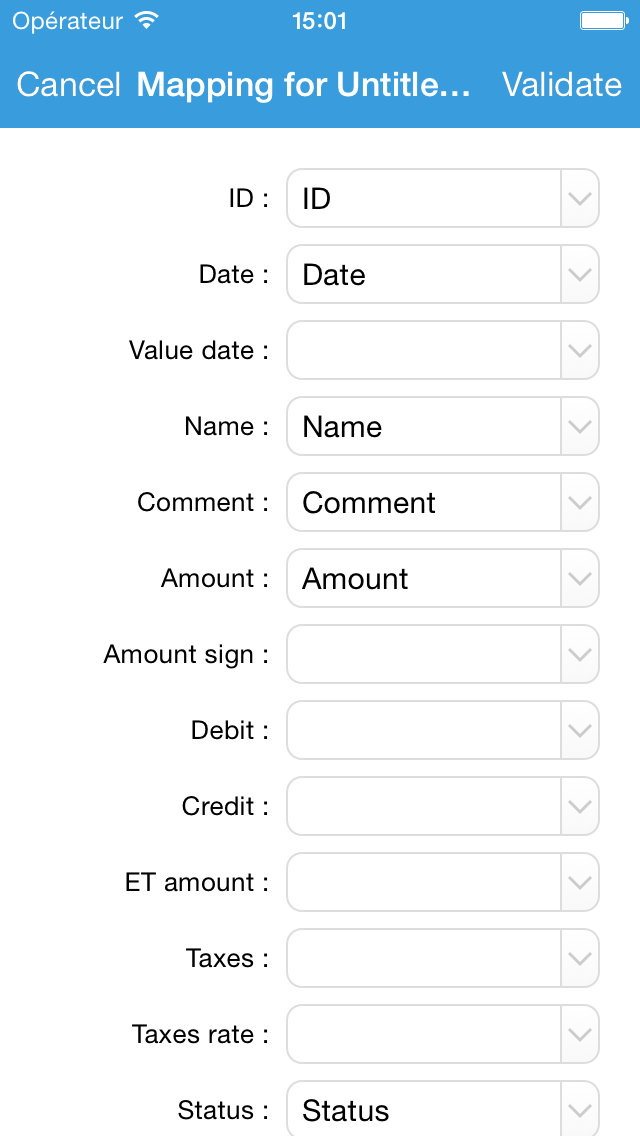
The mapping screen will appear next to let you match the iCompta fields with the fields contained in the file. For QIF and OFX files the mapping is automatically set and won't appear unless you activate import / export advanced mode in the settings of the bottom toolbar of the import configurations list.
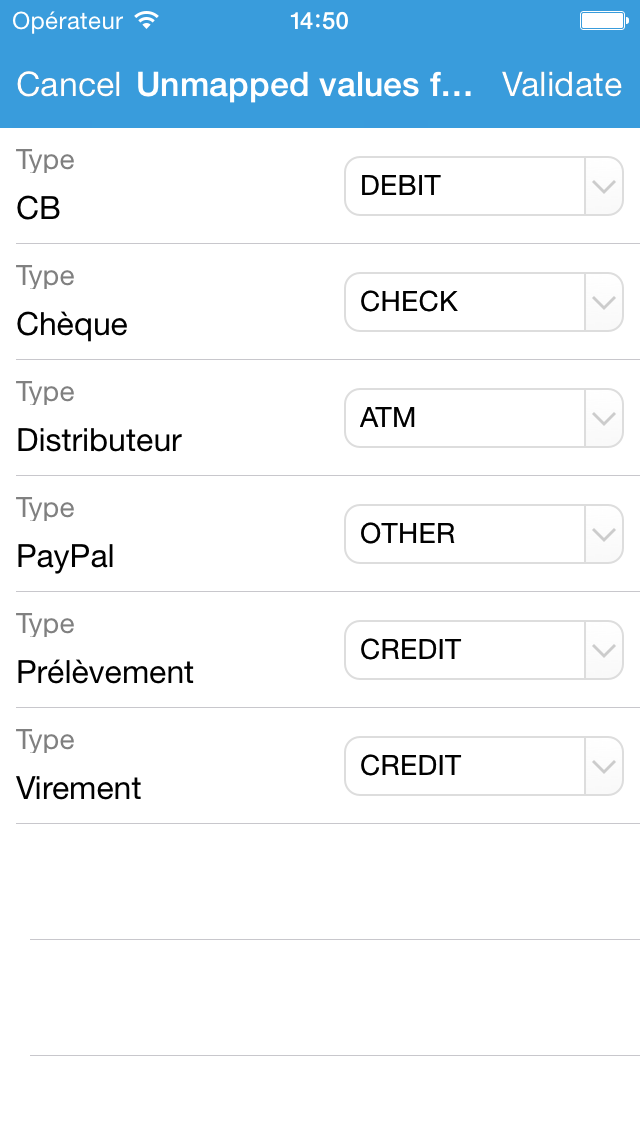
Unmapped values
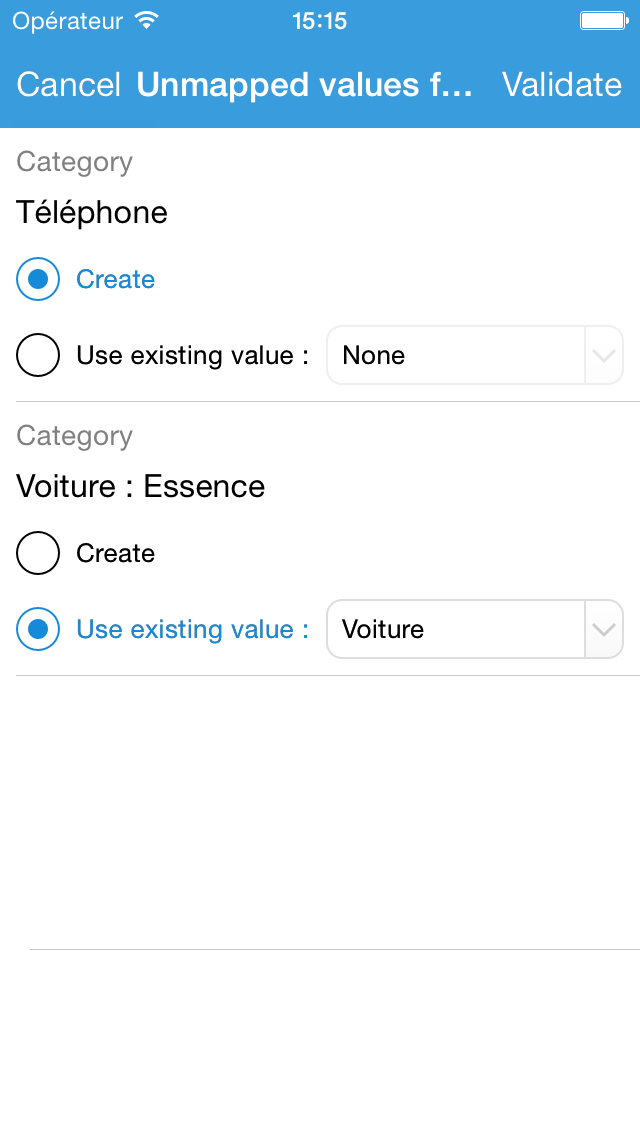
If the imported file contains categories that do not exist in your accounts file for example, iCompta will ask you if you want to create them or use an existing one instead.
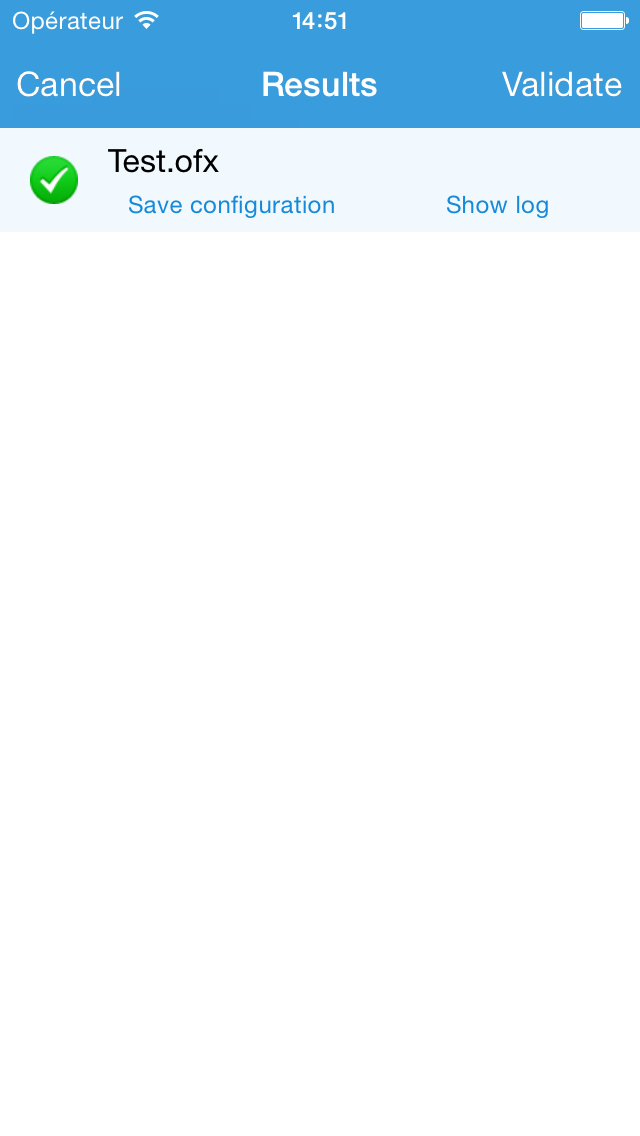
Results
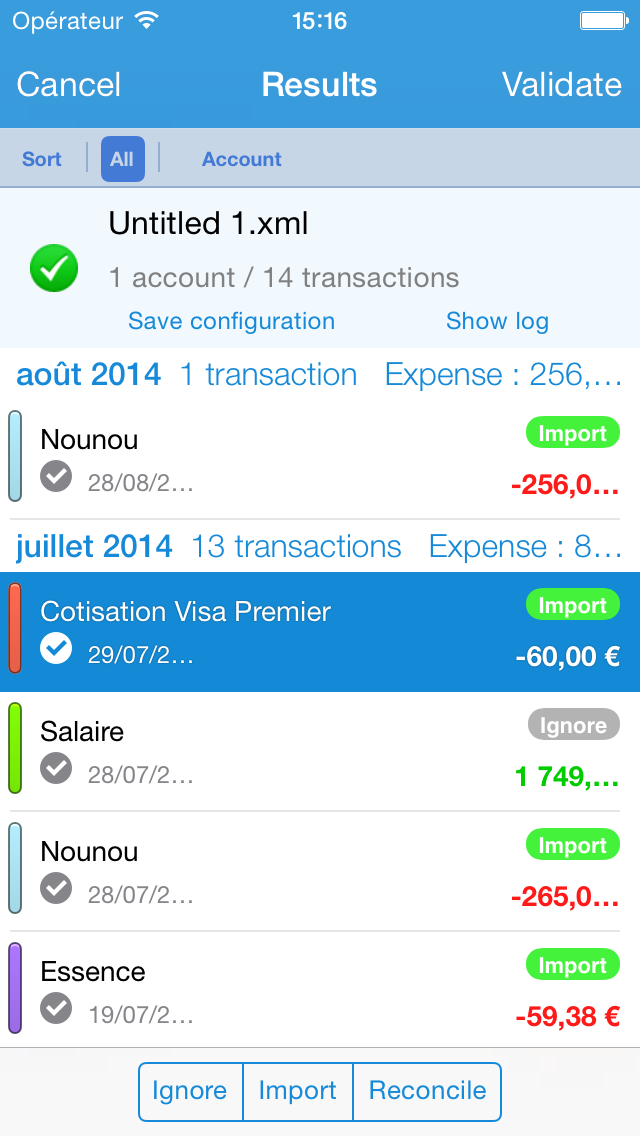
When import is finished, iCompta will show you the imported transactions in the results window. The choice column lists the action to execute for each transaction. You can ignore it, import it or reconcile it with one or more existing transactions. If you didn't enable reconciliation in the settings window all choices will be set to import otherwise they will be set to reconcile if an existing transaction was found and its status was planned or created or to ignored if an existing transaction was found and its status was cleared or locked.
The automatic reconciliation works great for most transactions but let's say you created a scheduled transaction for your salary but this month you get a bonus. When you download latest transactions from your financial institution, iCompta won't find the existing salary transaction as the amount differs because of the bonus. In this case you can select the imported salary transaction in list and touch the reconcile button in the bottom right corner. The list of the existing transactions will appear with the filters bar prefilled according to the criteria you specified in the settings window. You just have to change the values in the filter bar to make the existing salary transaction appears and then select it. Now you can click on the reconcile button in the top right corner.
You can also reconcile a single imported transaction with several existing transactions. This could be the case if you received several checks and created a transaction for each in iCompta but your financial institution only has one line for them. In that case it is the same way as explained above except that you have to select several transactions in the existing transactions list. You can also reconcile several imported transactions with one or more existing transactions by selecting several imported transactions before clicking on the reconcile button in the bottom right corner.
You can save your import configuration by clicking on the save configuration button in order to reuse it for other files. You can view and manage saved import configurations by selecting the import configurations line in the main list.
Exporting your data
You can export transactions in QIF, OFX, CSV, XML or JSON format. To do so you can either use the embedded web server or touch the export button under the transactions list. In the first case a window will ask you to choose the accounts and the transactions to export and in the second case only the transactions that are currently displayed in the transactions list will be exported so you can use the filters bar to choose exactly what will be exported.
Settings
The settings screen will appear next to let you edit the following properties :
- Encoding
- Date format : use yy or yyyy for the year, MM for the month and dd for the day. The date format is case sensitive so make sure to enter MM and not mm. For example if you want the dates to be formatted like 02/24/2012 you have to set the date format to MM/dd/yyyy.
- Decimal separator
- Grouping separator
CSV settings
- CSV separator
XML settings
- Accounts path : enter the path to put the accounts nodes from the root node.
- Account name path : enter the path to put the name from an account node.
- Account number path : enter the path to put the number from an account node.
- Transactions path : enter the path to put the transactions nodes from an account node.
- Splits path : enter the path to access the put nodes from a transaction node.
JSON settings
- Accounts path : enter the path to put the accounts array from the root object.
- Account name path : enter the path to put the name from an account object.
- Account number path : enter the path to put the number from an account object.
- Transactions path : enter the path to put the transactions array from an account object.
- Splits path : enter the path to put the splits array from a transaction object.
Mapping

The mapping screen will appear next to let you tell which iCompta fields you want to export and how to name them. For QIF and OFX files the mapping is automatically set and won't appear unless you activate import / export advanced mode in the settings of the bottom toolbar of the export configurations list.
Unmapped values
If the export format requires specific values for some fields, iCompta will ask you to give the value to use for each value in iCompta.
Results
You can save your export configuration by clicking on the save configuration button in order to reuse it for other files. You can view and manage saved export configurations by selecting the export configurations line in the main list.
Reconciliation
The different steps of a transaction's life
The workflow of a transaction is defined by its status :
- Planned : the transaction is planned but is not included in the balance of the account yet and it can be recomputed by iCompta.
- Created : the transaction is included in the balance but not in the cleared balance.
- Imported : the transaction has been imported from a downloaded file for example, it is included in the balance but not in the cleared balance.
- Cleared : the transaction has been taken into account by your financial institution, it is included in the balance and in the cleared balance.
- Locked : you have checked the transaction on your bank statement, it can't be modified anymore.
- Canceled : the transaction has been canceled.
There are different ways to reconcile depending on whether you enter your transactions manually in iCompta or download them.
Manual input : checking the cleared balance
If you enter the transactions yourself in iCompta you probably open your financial institution's web site from time to time to see which transactions have been cleared. For these transactions change the status from created or planned to cleared by clicking on the status icon of the transaction line. At the end you should check that the cleared balance of the account displayed in iCompta is the same as the one displayed on the web site. If it's not it means you forgot to enter some transactions or that there are some mistakes in the amounts.
You can also download transactions from your financial institution's as an alternative of the above method. In the import settings, set the status of imported transactions to cleared by default, enable reconciliation with existing transactions and choose to update the status of existing transactions. This is really the same thing as above but a little more automatic.
Download only : checking transactions
If you only download your transactions in iCompta you probably check them from time to time to make sure there are no mistakes. The transactions you download in iCompta are added with an imported status. If everything is OK change the status from imported to cleared by clicking on the status icon of the transaction line. You can then see which transactions remain to be checked by using the "Pending" filter of the transactions list which hides cleared transactions.
Using the bank statements reconciling tool
If you want to go further and compare your transactions in iCompta with your bank statements you can touch the reconcile button under the transactions list (… button then "Reconcile" on iPhone). If this is the first time you reconcile you have to enter the starting balance of your bank statement otherwise it will be filled with the previous ending balance. Enter the ending balance and you will see that the difference is updated. You can now mark the transactions that are on your statement by touching them. When you mark transactions the difference field is updated so at the end it should be 0 if there are no mistakes. At that moment you can validate to set the status of the marked transactions to locked and a new line will appear in the bank statements list. You can tap its blue arrow later on to show all the transactions of that statement.
Making reports
Accounts summary
You can print the list of accounts with their balance by clicking on the print button under the accounts list.
Balance evolution

You can show the balance evolution graph by clicking on the button under the transactions list (… button then "Balance evolution" on iPhone). The balance is displayed in blue along with three dotted lines for the minimum balance, the maximum balance and the average balance.
If the end date of the graph is past today and you enabled the option, the forecast of the account balance is displayed in dark blue. The forecast is based on the average income and expense of previous months.
When you touch the graph, a black bubble shows the date and the balance corresponding to your finger position.
You can double tap on either axis to make the graph bigger. If you do it with two fingers it will make the graph smaller instead.
Assets evolution
You can see the evolution of your assets by putting a frequency (1 year for example) in the settings in the bottom left corner of the balance evolution graph.
Creating and customizing a report
You can create a new report by clicking on the edit button in the top right corner of the main list and then by selecting the new report line.
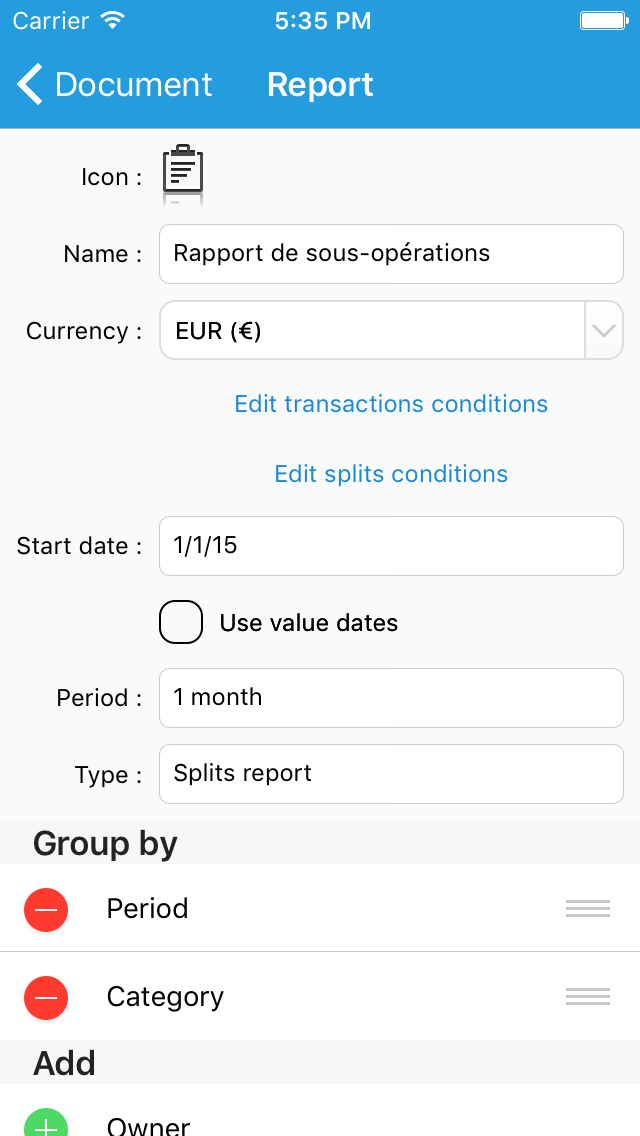
In the report editing window you can change the following properties :
- Icon : touch the existing icon to choose a new image from the photo library.
- Name
- Currency : if some transactions belong to an account with a different currency they will be converted to the currency of the report with the current change rate.
- Transactions filter : allows you to define which transactions will be included in the report. By default all transactions are included so you can narrow to specific accounts for example by adding "The account is XXX" conditions.
- Splits filter : in each transaction that passed the transactions filter, allows you to define which splits will be included in the report. By default all splits are included so you can narrow to specific categories for example by adding "The category is XXX" conditions.
- Type : the different types are presented below.
- Start date
- Period : tells the period used to group transactions.
- Group by : you can tell which fields to use to group transactions.
- Compare : tells whether to compare expense or income in the case of a comparative report.
- Options : allows you to show or hide the total of periods and the average of periods in the case of a splits report, a comparative report or a pie chart. For the pie chart and the bar chart, show top level items only allows you for example to display only parent categories instead of all subcategories.
Splits report
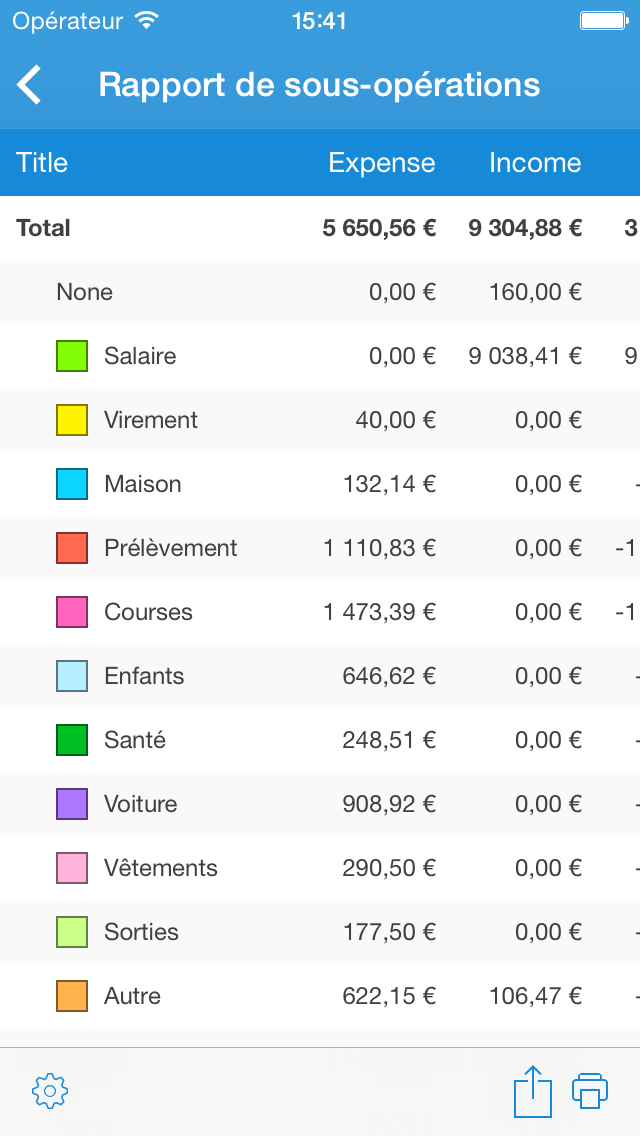
You can select a line to show the corresponding transactions. You can also make a deep touch (3D Touch) on a line to preview the corresponding transactions.
Comparative report
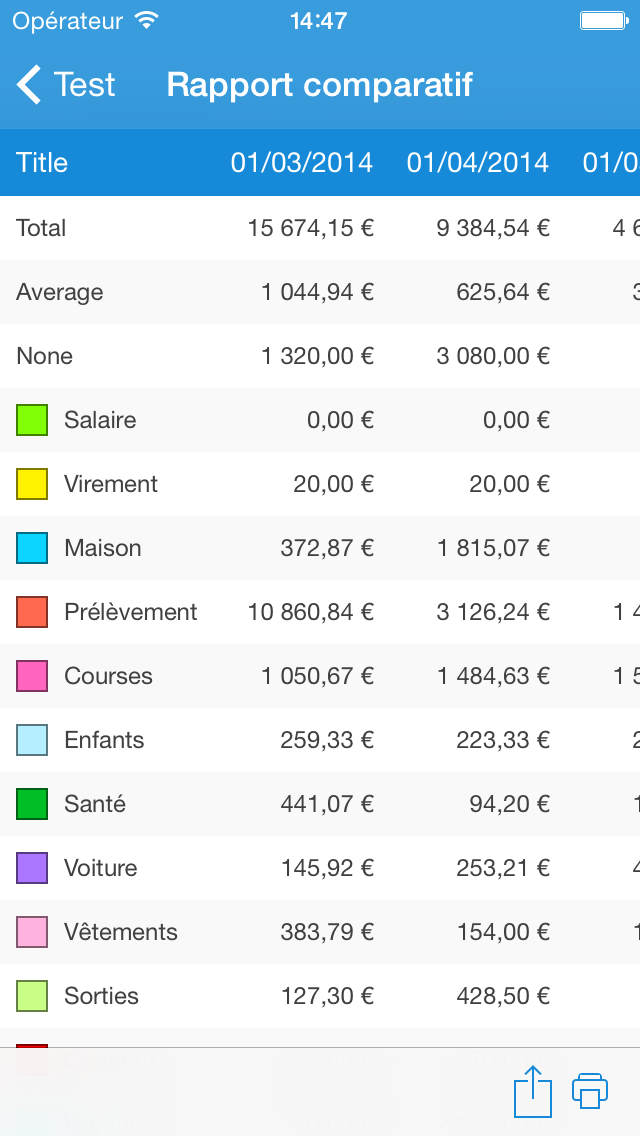
You can select a line to show the corresponding transactions. You can also make a deep touch (3D Touch) on a line to preview the corresponding transactions.
Pie chart
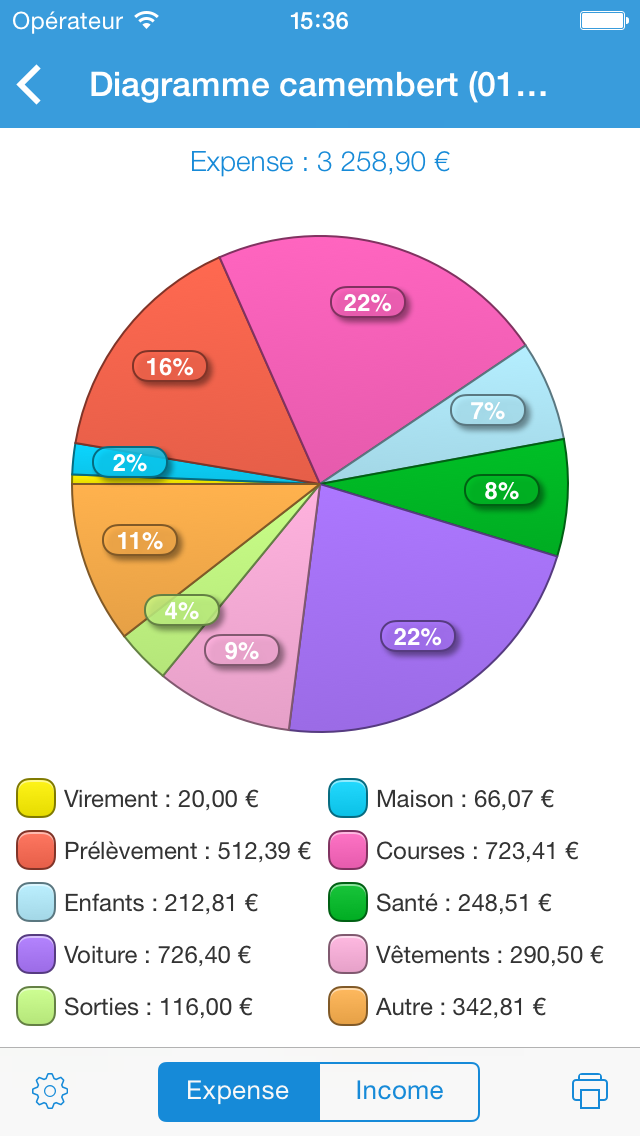
You can choose the group to display by clicking on the button under the pie charts.
You can double tap on a slice to show the corresponding transactions. You can also make a deep touch (3D Touch) when a slice is selected to preview the corresponding transactions.
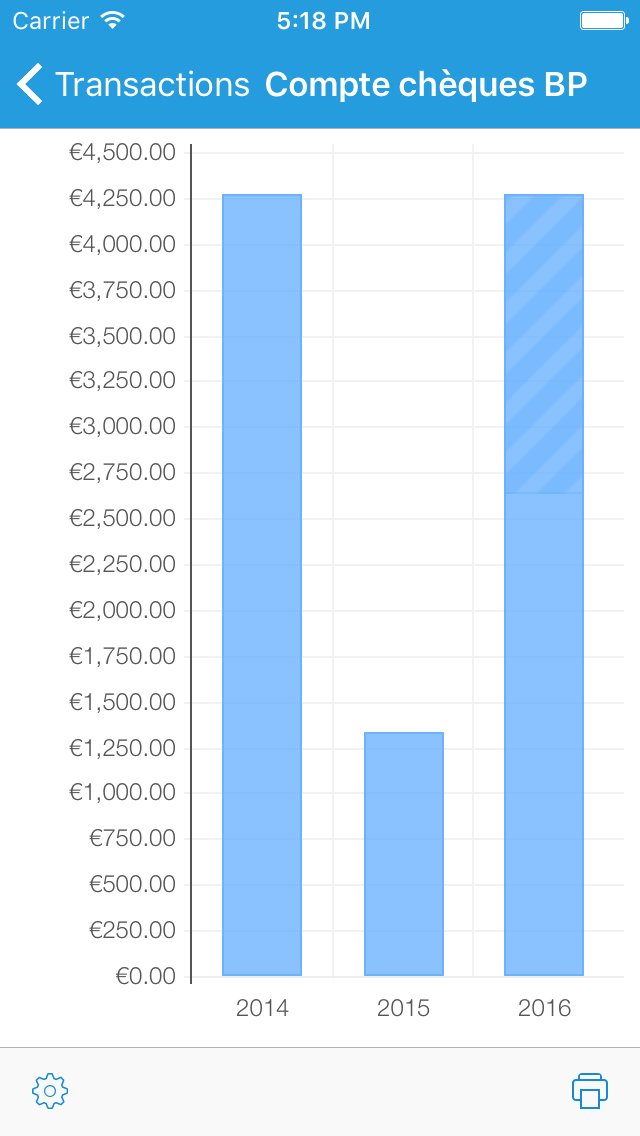
Bar chart
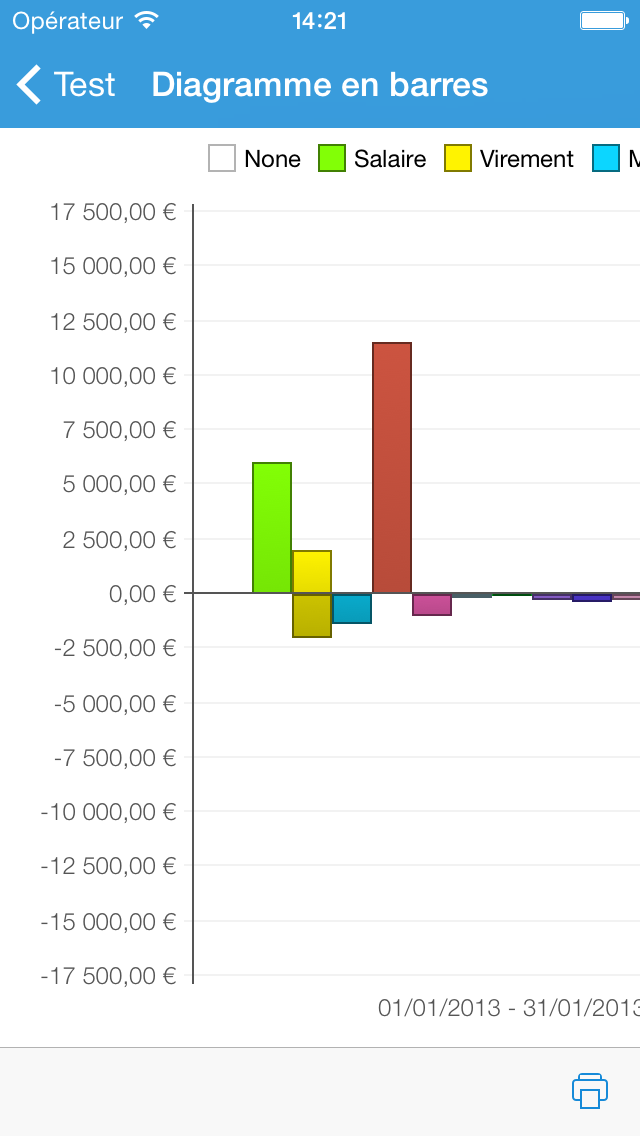
You can double tap on either axis to make the graph bigger. If you do it with two fingers it will make the graph smaller instead.
You can double tap on a bar to show the corresponding transactions. You can also make a deep touch (3D Touch) on a bar to preview the corresponding transactions.
Monitoring your budget
A budget allows you to monitor your expense and income on a periodic basis. You have to define how much you expect to spend and how much you expect to earn in a month for example and you will be able to see if you stay in line with these expectations.
Creating or editing a budget
You can create an budget by clicking on the edit button in the top right corner of the main list and then by selecting the new budget line. When you create a new budget, a new window appears to let you edit its properties. If you want to edit an existing budget just select its line when the edit mode is on.
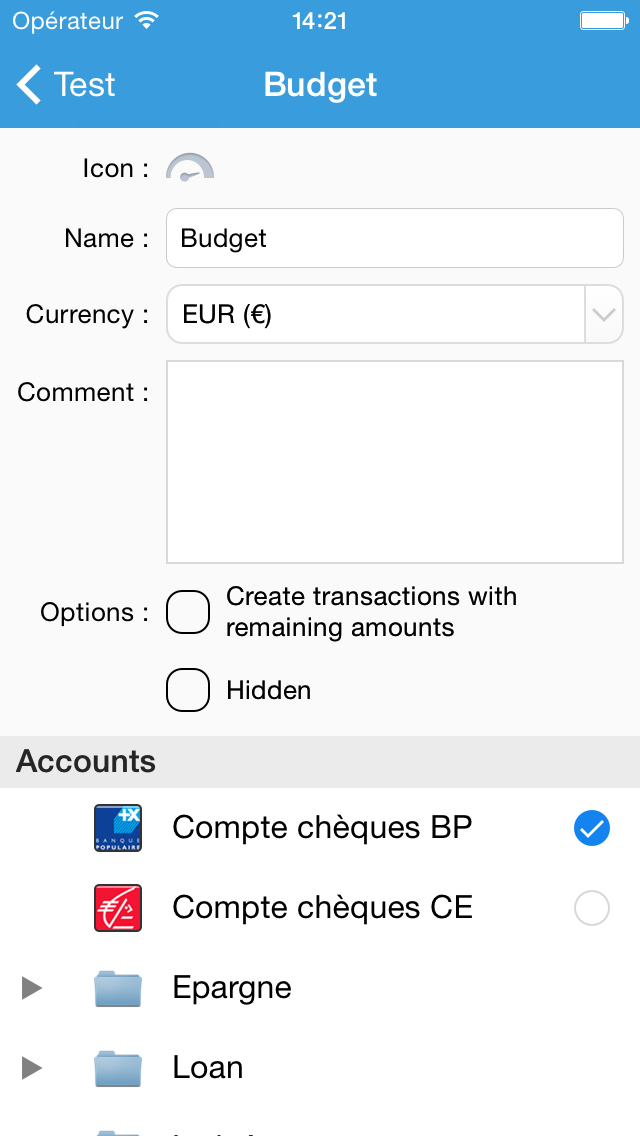
In the budget editing window you can change the following properties :
- Icon : touch the existing icon to choose a new image from the photo library.
- Name
- Currency : go here to learn how to add a new currency.
- Accounts
- Items : you define the expected expense or income for a category on a given period.
- Category : choose "Other categories" if you want the line to match all splits that are not already included in other lines.
- Start date
- End date : leave empty if you want the line to start over indefinitely.
- Duration : the duration after which a new period is created and the line starts over from 0.
- Amount
- Income : if checked the line searches credit splits and debit splits whose refund box is checked. On the opposite, if not checked the line searches debit splits and credit splits whose refund box is checked.
- Create transactions with remaining amounts in accounts : if you enable this iCompta will compute how much is remaining to spend or earn for the budgeted categories and create transactions in the monitored accounts.
- Hidden : if you don't want it to be shown in the budgets list you can check this box. If you want to look at it later on you can make it reappear by activating the show hidden items button in the settings window from the bottom toolbar of the main list.
You can change the amount you defined for a category at any time and you will be asked if you want to modify all periods or just the future ones. If you want to adjust the amount of some periods in particular, you can do it by clicking on the little pencil next to the budgeted amount on a line when you look at the periods of a budget.
If you want to allocate an amount for all your categories you can click on the row at the bottom of the list to create a line for each missing category automatically. Buttons at the very bottom of the screen also allows you to modify the start date or the end date of all lines at once.
You can also create a budget whose items will be pre-filled by selecting transactions in the transactions list using the "Select" mode then clicking on "Other action" and "Create a new budget".
Removing a budget
You can remove a budget with a left swipe on its line or by touching the red - button when the edit mode is on. If you just want to hide this budget from the budgets list but you still want to be able to look at it later set it to hidden in the budget editing window instead.
Monitoring a budget using progress bars
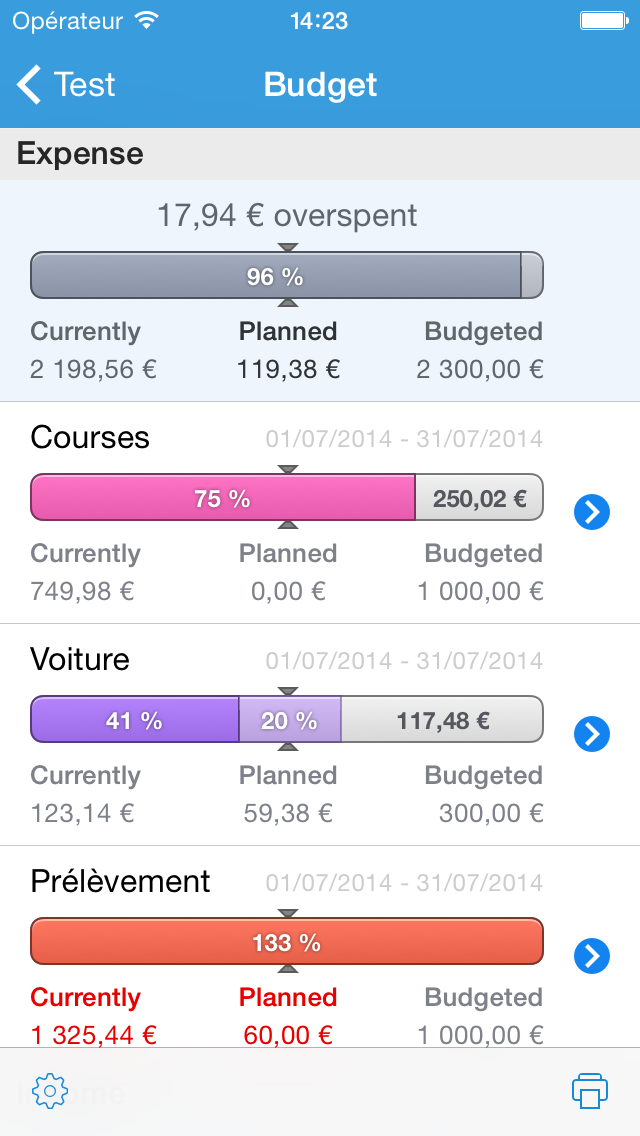
The first way to monitor your budget is by looking at the progress bars by activating this mode in the settings of the bottom toolbar.
You can click the blue arrow on a line to show the corresponding transactions. You can also make a deep touch (3D Touch) on a line to preview the corresponding transactions.
If you didn't spend all the budgeted money for a given month you can choose to add that unspent money to the budgeted money of next month by activating the propagation of final situation of periods to the next ones.
Monitoring a budget using envelopes
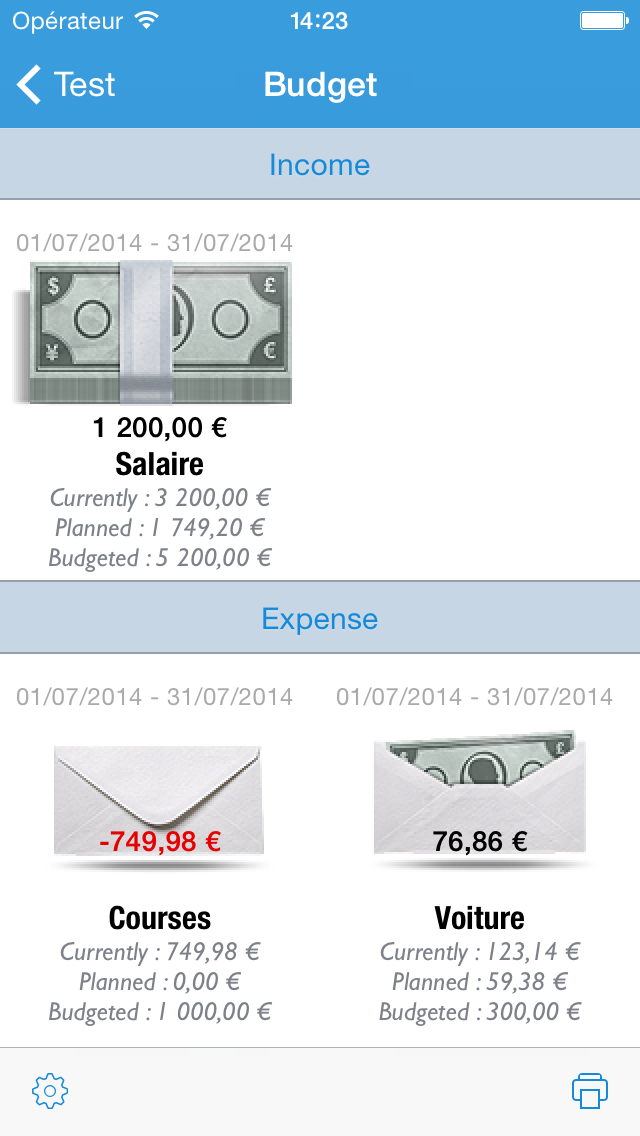
The second way to monitor your budget is by using envelopes by activating this mode in the settings of the bottom toolbar. In this mode, income categories are shown as a stack of cash and expense categories as envelopes. You have to drag & drop cash on envelopes to fill them.
Navigating between the different periods of a budget
There are several ways to choose which periods of a budget are displayed.
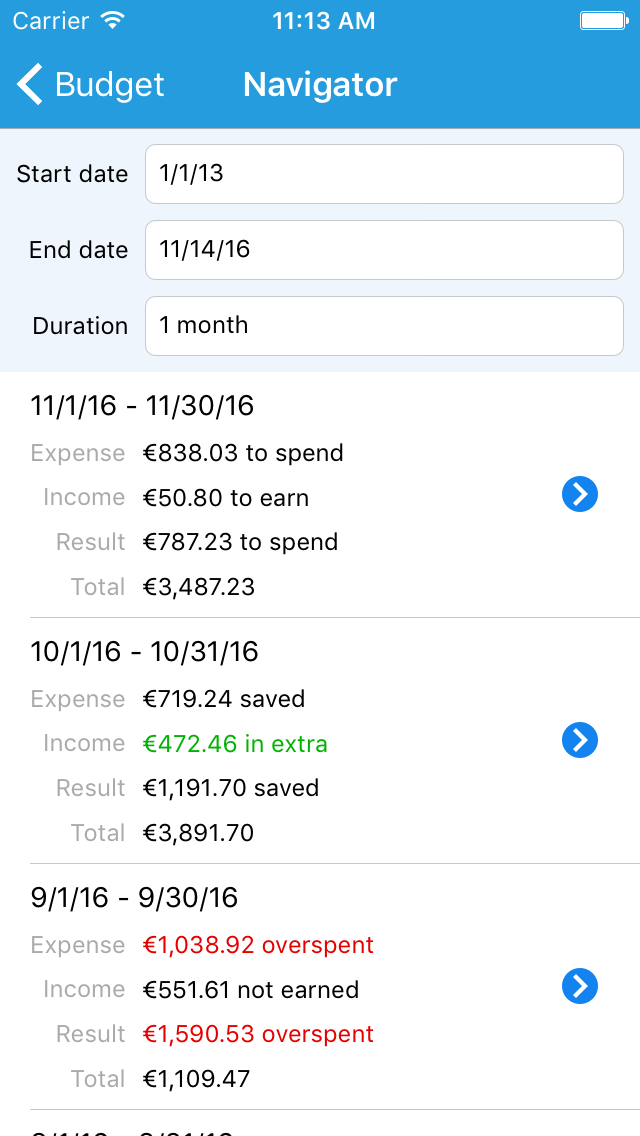
By activating the navigator you can see all the periods of a budget at a glance. If you click the blue arrow on a line, it will come back to previous screen and select the corresponding periods.
The navigator displays the periods for all the budget items or just the selected ones if you have selected items in the previous screen. Several informations are displayed for each period : the expense, the income, the result of both expense and income and finally the total of all splits included in the period.
You can also set a date in the "Show situation on" field in the settings under the progress bars. It will the select the period running on that date for each category line.
- Example : you created a budget with the following categories :
- Food category, monthly and starting on 01/01/13.
- Other category, weekly and starting on 01/01/13.
- Holiday category, every 6 months and starting on 01/01/13.
- If you set the date to 01/10/13 in the "Show situation on" field for example, it will display the 01/01/13 - 01/31/13 period for the food category, the 01/08/13 - 01/14/13 period for the other category and the 01/01/13 - 06/30/13 period for the holiday category.
- If you set the date to 07/01/13 in the "Show situation on" field for example, it will display the 07/01/13 - 07/31/13 period for the food category, the 06/25/13 - 07/01/13 period for the other category and the 07/01/13 - 12/31/13 period for the holiday category.
Last, if you want to have more control, you can choose which periods to display for each category by clicking on the periods popup button in the category line.
Monitoring your investments
Managing securities
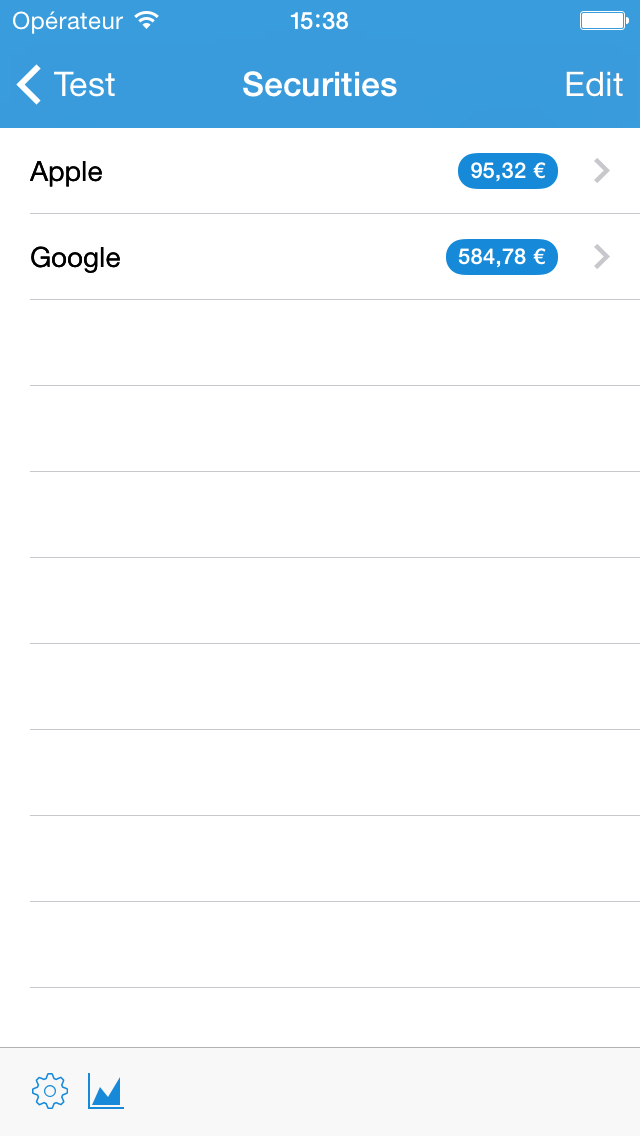
You can add or remove securities by selecting the securities line in the main list.
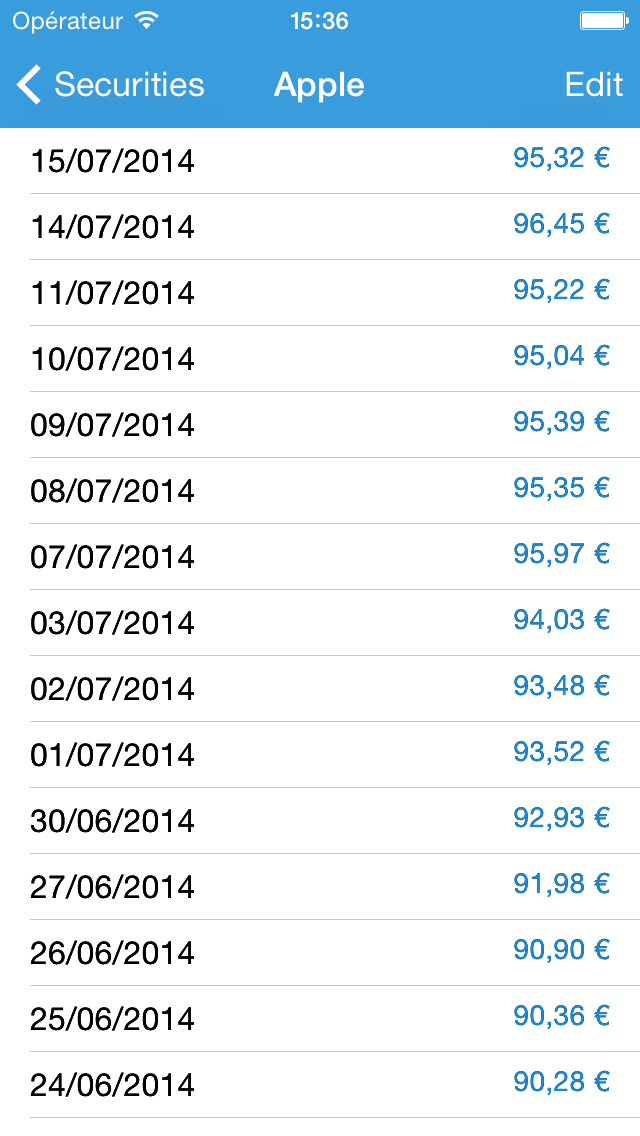
When you enter the symbol for a security, iCompta can download the latest quotes from an external provider if you enable it in the settings of the bottom toolbar. You can also enter the quotes yourself in the quotes window by selecting the line of the security.
- To download quotes from Yahoo :
- Go to http://finance.yahoo.com
- Search for the company or the fund you want and click on the link to go to its page
- Besides the name of the company or the fund there is a symbol between parentheses. This is that symbol you need to enter in iCompta after the prefix "Yahoo:"
- For example for Apple, you have to enter the symbol Yahoo:AAPL in iCompta
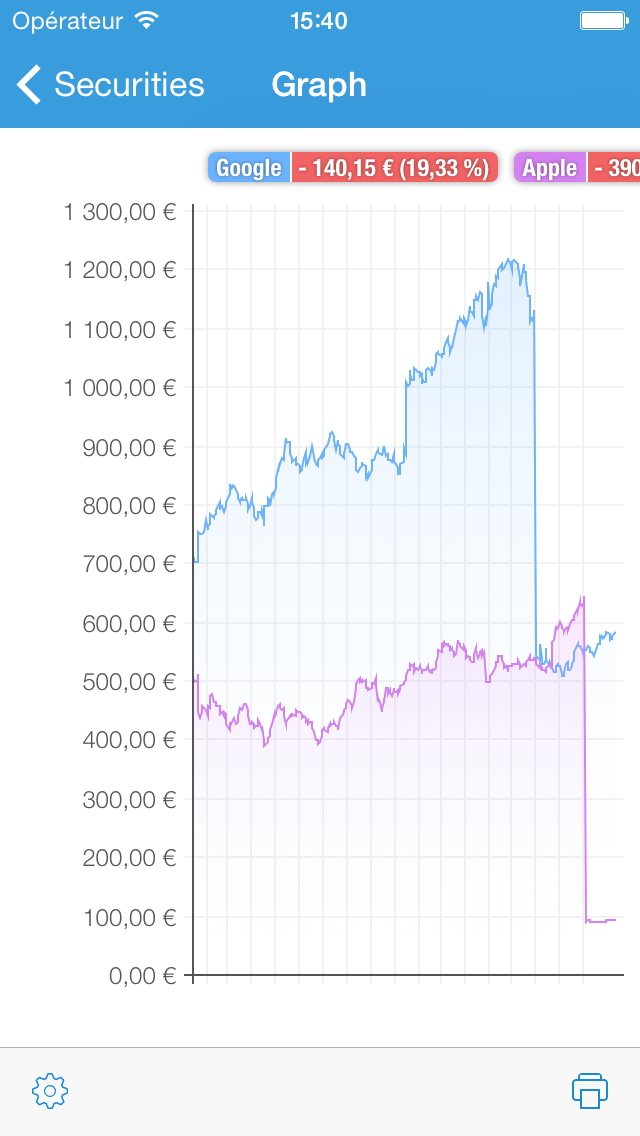
You can see the evolution of one or more securities by clicking on the second button in the bottom toolbar. You can double tap on either axis to make the graph bigger. If you do it with two fingers it will make the graph smaller instead.
Creating an investment account
Now that you have set securities you can create an account and set its type to investment. When you create a transaction in the investment account you can specify if it is related to a security and what kind of operation it was (buy, sell, etc.) as well as the number of shares.
- Specific case of a stock split :
- You create a first transaction to remove the number of shares before the split, with an amount of 0
- Then you create a second transaction to add the number of shares after the split, still with an amount of 0
- Specific case of a transfer of shares between accounts :
- You create a transfer between the 2 accounts
- The amount of the transfer must be equal to the average cost of the security x the number of transferred shares
- You change the value of the "Investment" field to "Sell"
- You enter the security and the number of transferred shares
- You select the corresponding transaction in the other account
- You change the value of the "Investment" field to "Buy"
- You enter again the security and the number of transferred shares
- Last, you create another transfer between the 2 accounts with the opposite amount of the first one to keep the same balances
Monitoring your portfolio
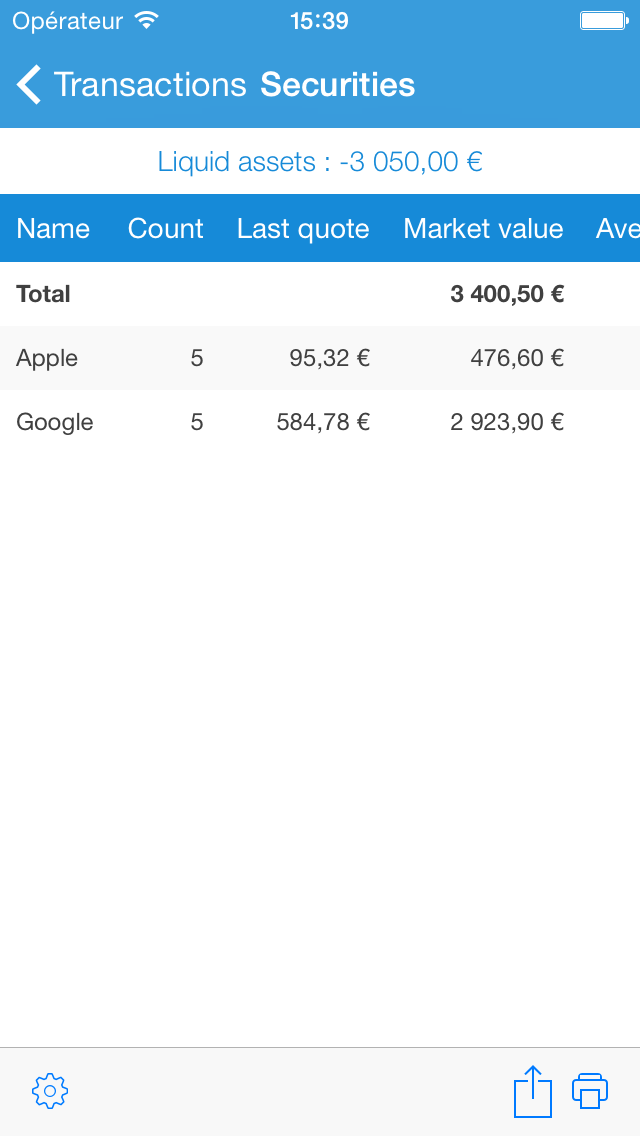
You can see the situation of your portfolio by showing the securities screen by clicking on the button under the transactions list (… button then "Securities" on iPhone).
This screen shows all the securities you own in the selected accounts and for each security :
- The current number of shares
- The last quote
- The market value
- The average share cost (commission included)
- The profit :(last quote - average cost) × number of shares + dividends
- The realized profit :∑ amount of sale (commission included) - (average cost at the date of the sale × number of shares sold)
- The return on investment :(market value at the end of the period + dividends during the period + sales during the period) / (market value at the beginning of the period + purchases during the period)
- The sum of commissions
Managing shared expenses with people
Shared transactions are used to help to solve the common problem of who owes what to whom when you buy things with people. In order to accomplish this, you need to create a split for each participant in the shared transactions.
- Example : you make a trip with 3 friends, sharing all charges, and you want to know the situation at the end of the trip.
- You start by creating the people corresponding to your friends and you add transactions in their newly created accounts for what they have paid. In every transaction you need to uncheck "Make the sum of splits" and create 3 splits in order to have a total of 4 splits with a ratio of 25% each. On 3 of these splits you will set respectively you and your other 2 friends in the transfer field.
- Then you add your own expenses in your accounts. In every transaction you need to uncheck "Make the sum of splits" and create 3 splits in order to have a total of 4 splits with a ratio of 25% each. On 3 of these splits you will set respectively your 3 friends in the transfer field. On the last split that corresponds to your participation in the transaction you can set the appropriate category.
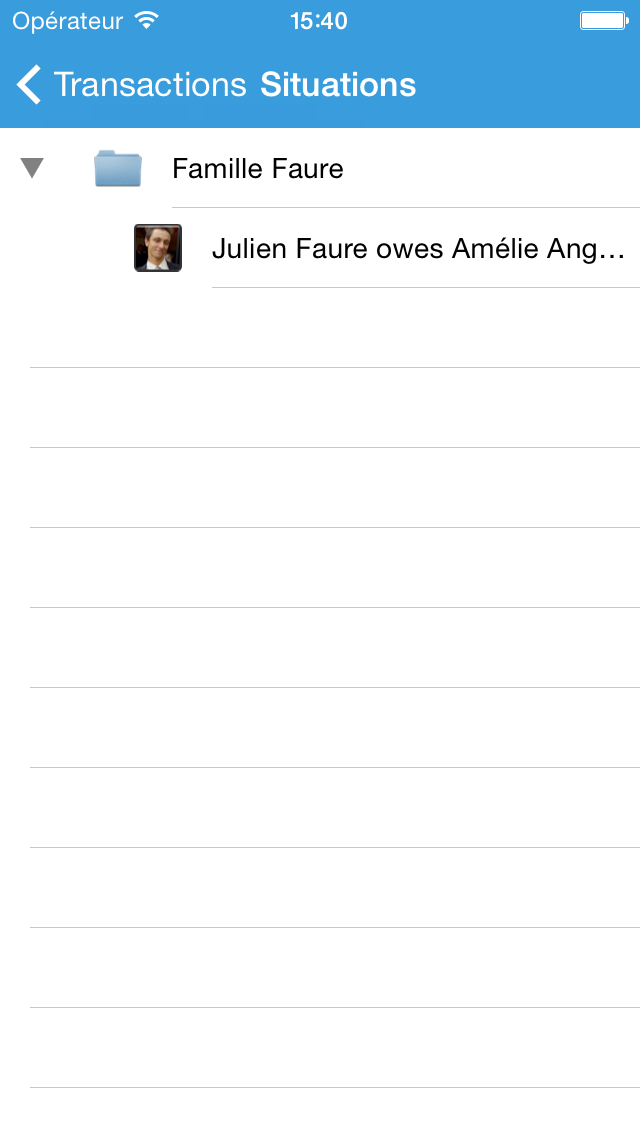
- You will then know everyone's debts in the situations board by selecting someone in the accounts list and then clicking on the situations button under the transactions list (… button then "Situations" on iPhone).
- When someone pays his or hers debts, you need to create a transaction with the amount of the refund in this person's account and set the refunded person in the transfer field.
Making rules to automate things

You can add or remove rules by selecting the rules line in the main list. A rule is used to perform actions on transactions when a set of conditions is fulfilled.
You can apply rules to selected transactions in the "Select" mode of the transactions list by clicking on "Other action" and "Apply rules".
The rules are assessed sequentially in the order they appear in the list.
- Example : setting a default type for new transactions in a given account.
- Create a new rule and name it "Credit card".
- Add a condition and change it to "The account is CC" (assuming you have an account named "CC").
- Add a new condition and change it to "Transaction being created ✓".
- Add an action and change it to "Set type to Credit card".
- Now when you create a new transaction in the "CC" account, you can apply rules to automatically set the type of the new transaction to "Credit card".
- Example : you want to extract the date from downloaded transactions having a name like CARD 111416 SC*12345678 SHOP.
- Create a new rule and name it "Date".
- Add a condition to check that the transaction matches the pattern : "The name matches regular expression CARD \d{6} SC\*\d+ .+".
- Add an action to set the date as the value date : "Set value date to the contents of date".
- Add an action to extract the date from the name : "Set variable date from name by replacing the regular expression CARD (\d\d)(\d\d)(\d\d) .+ with $1/$2/$3".
- Add a new action to set the date : "Set date to the variable date".
- Last, add an action to only keep the useful part of the name : "Modify name by replacing regular expression CARD \d{6} SC\*\d+ (.+) with $1".
- Example : you want to merge the name and comment fields.
- Create a new rule and name it "Name + Comment".
- Add an action to store the current name : "Set variable name from name by replacing the regular expression [leave empty] with [leave empty]".
- Add an action to store the current comment : "Set variable comment from comment by replacing the regular expression [leave empty] with [leave empty]".
- Add an action to create a variable with the name and comment merged : "Set variable result with the value {{ name }} {{ comment }}".
- Add a new action to set the final name : "Set name to the variable result".
- Last, add an action to clear the comment : "Set comment to [leave empty]".
Adding a password on open
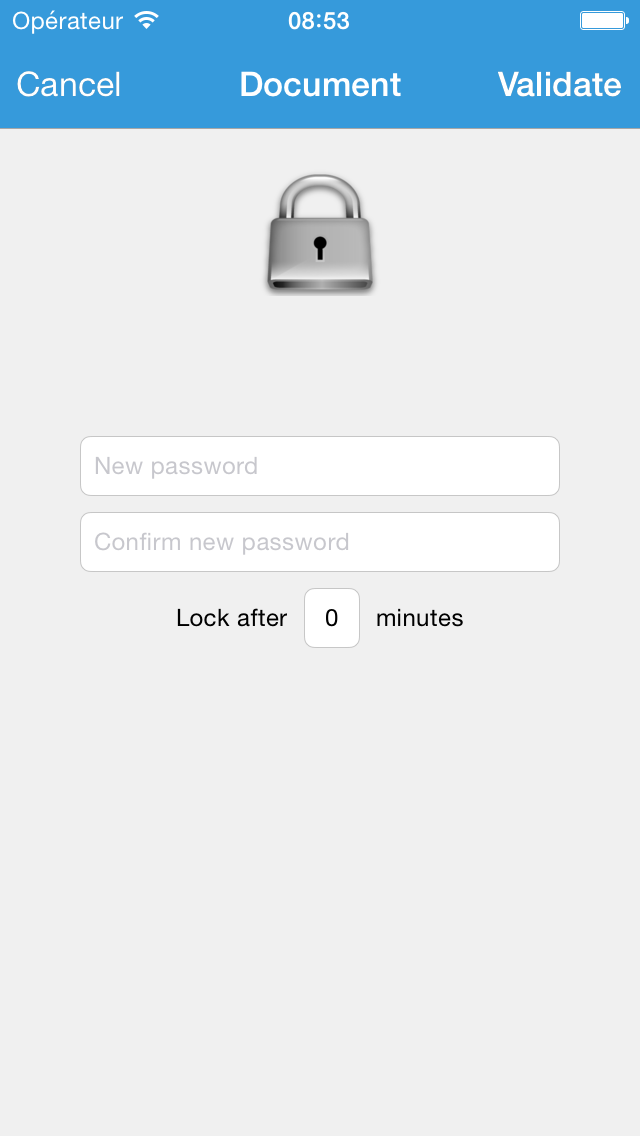
You can add a password on open by clicking on the lock button in the bottom toolbar of the main list. Next time you open your document you will have to enter the password to see the data.
Please be aware that unlike iCompta 2, this is just a software protection and the data file on your disk is not encrypted.
Synchronizing your data
You can synchronize your document with other computers or mobile devices using iCloud, Dropbox or via the local network.
By default, iCloud or Dropbox synchronization is automatically performed in background but you can choose to do it manually in the settings of the bottom toolbar.
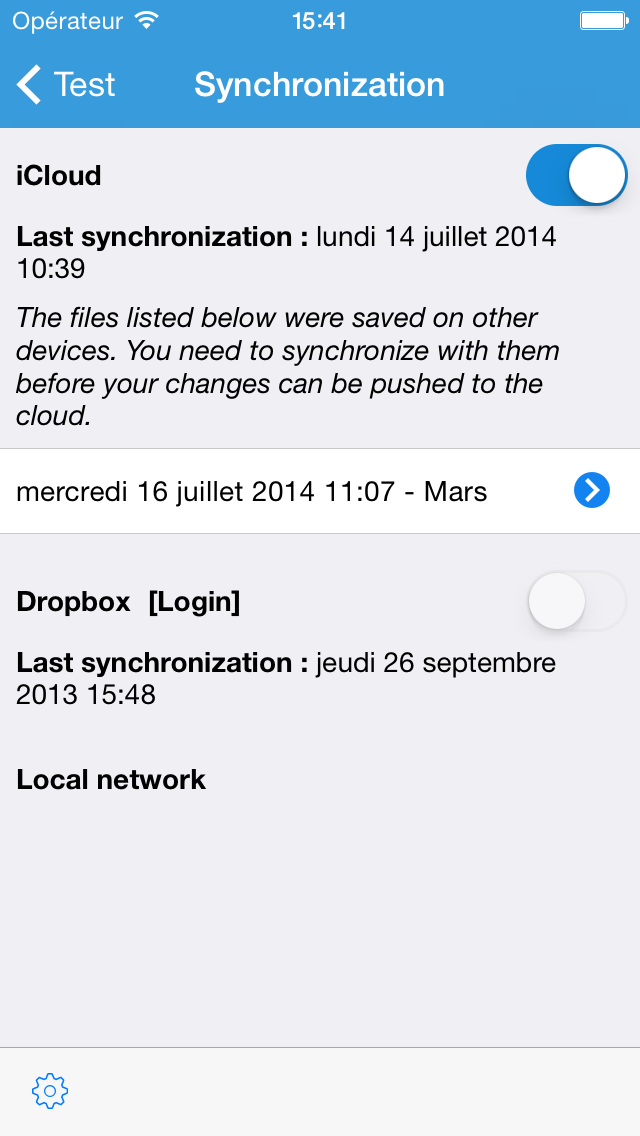
iCloud
To allow iCloud synchronization you must be logged in iCloud via the Settings app of the iPhone / iPad and have activated "Documents & Data" if you have iOS 7 or "iCloud Drive" if you have iOS 8.
You can activate iCloud synchronization in the synchronization line in the main list. When activated, iCompta will send your document to iCloud when you save it. Now you can open this document on another device and make some changes. When you save on the other device, iCompta will be notified and will show a new line in the iCloud section. If the automatic synchronization is activated, the changes will be merged after a few moments otherwise you can touch the blue arrow on that line to start a synchronization with the modified data. The document won't be sent to iCloud even if you save it until all the other versions available have been processed.
Dropbox
To allow Dropbox synchronization you must have a Dropbox account and login to your account with the login button in the Dropbox line.
You can activate Dropbox synchronization in the synchronization line in the main list. When activated, iCompta will send your document to Dropbox when you save it. Now you can open this document on another device and make some changes. When you save on the other device, iCompta will be notified and will show a new line in the Dropbox section. If the automatic synchronization is activated, the changes will be merged after a few moments otherwise you can touch the blue arrow on that line to start a synchronization with the modified data. The document won't be sent to Dropbox even if you save it until all the other versions available have been processed.
If you use Dropbox synchronization the folder Applications/iCompta will be created in your Dropbox folder.
Step by step to activate Dropbox or iCloud synchronization
- Open your file and select the synchronization line in the main list.
- Toggle the switch on the far right of the iCloud or Dropbox line to enable synchronization (you can activate both but that would be useless and a waste of network bandwith).
- From now on iCompta will send your file to the cloud every time you click on the menu item (⌘S keyboard shortcut) on Mac or when you push the save button on iPhone / iPad. There is just an exception to this rule : if there are pending synchronizations (see the above paragraphs).
- When you save, iCompta will zip the database in the iCloud folder or in the Dropbox/Applications/iCompta folder so that it gets pushed in the cloud.
- So now you probably want to open that file in the cloud on other devices to make some changes.
- On Mac click on menu item and choose the one you just added.
- On iPhone or iPad go in the files browser and click on the iCloud or Dropbox button in the bottom toolbar and choose the one you just added.
- You can now make some changes on any device.
- When you save you should see a progress indicator on the right of the synchronization line.
- When it's over, it means that the file has been uploaded to the cloud.
- You should now see a progress indicator on the other device meaning that the synchronization data is being downloaded.
- When completed, the synchronization can finally begin and you should see your changes after a short amount of time.
Local network
To synchronize with other devices on your local network, iCompta must be launched and the synchronization line selected on each device. The available devices will be displayed in the local network section and you can touch the blue arrow on one line to start the synchronization process. An authorization dialog will appear on the other device if this is the first time. Unlike cloud synchronization, there are 3 different synchronization modes :
- Synchronize : changes on both sides will be merged.
- Send : the document on the other side will be overwritten.
- Get : the current document will be overwritten.
When iCompta is launched with the synchronization line selected on every device and all devices are connected to the same local network but yet you see no devices in the local network section, you should try to reboot your DSL box or WiFi router.
The synchronization changes window

When synchronizing with latest data on the cloud or another device through the local network, iCompta always does the same thing. First it will get the data and compare with the current data to see what is different. Then it will present you a list of changes between the 2 documents with the current value on the left and the value in the other document on the right. The most recent value is automatically selected and the other one is dimmed. You can click on the other value to choose it instead.
Professional features
You can enable professional features in the settings of the bottom toolbar of the main list.
Managing taxes
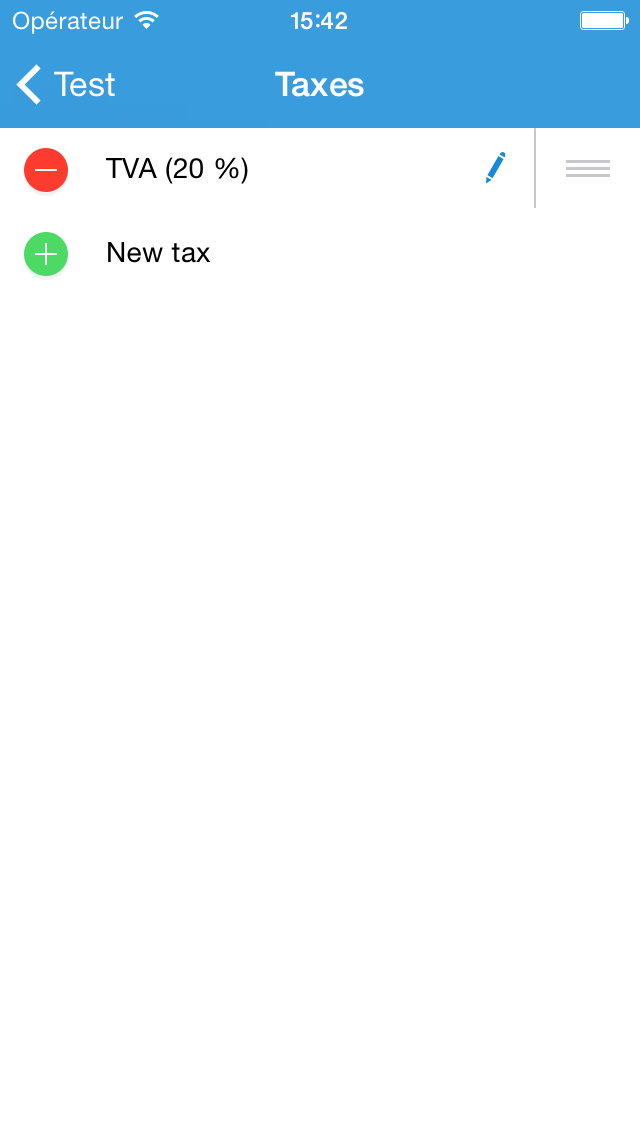
You can add or remove taxes by selecting the taxes line in the main list.
Managing companies
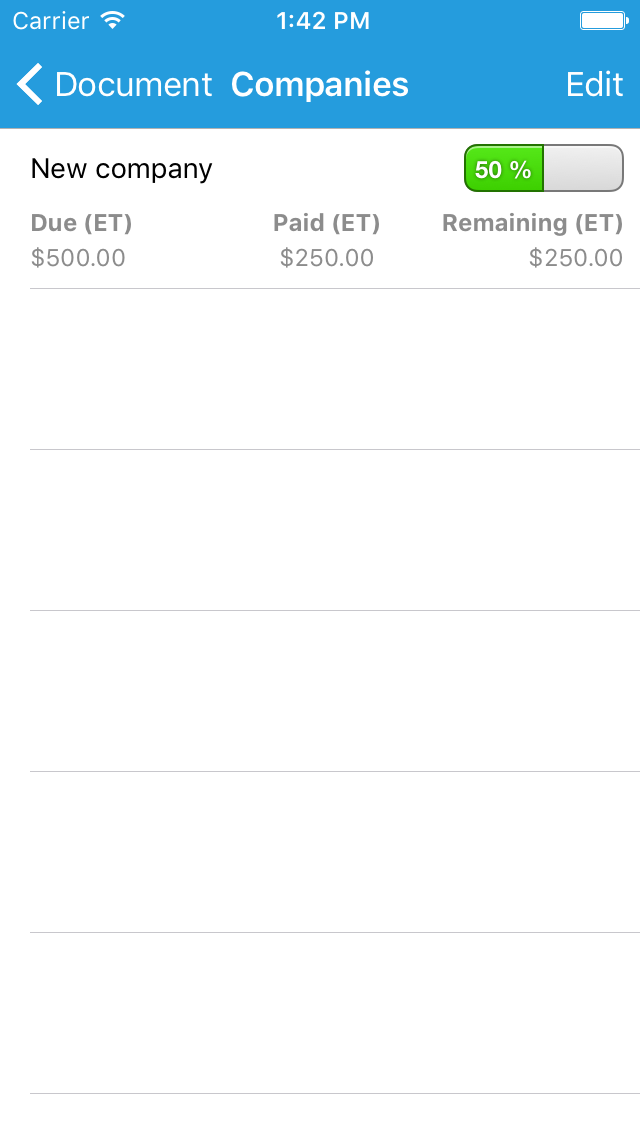
You can add or remove companies by selecting the companies line in the main list.
Managing clients
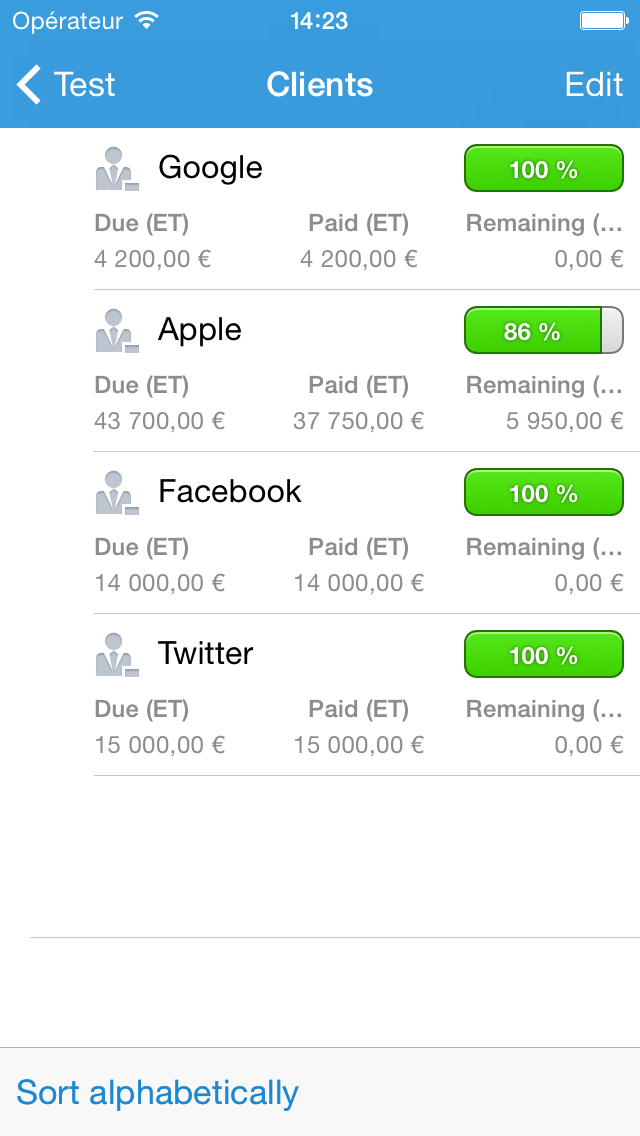
You can add or remove clients by selecting the clients line in the main list.
The amount a client has still to pay is displayed on his or her line along with a progress bar.
Making invoices
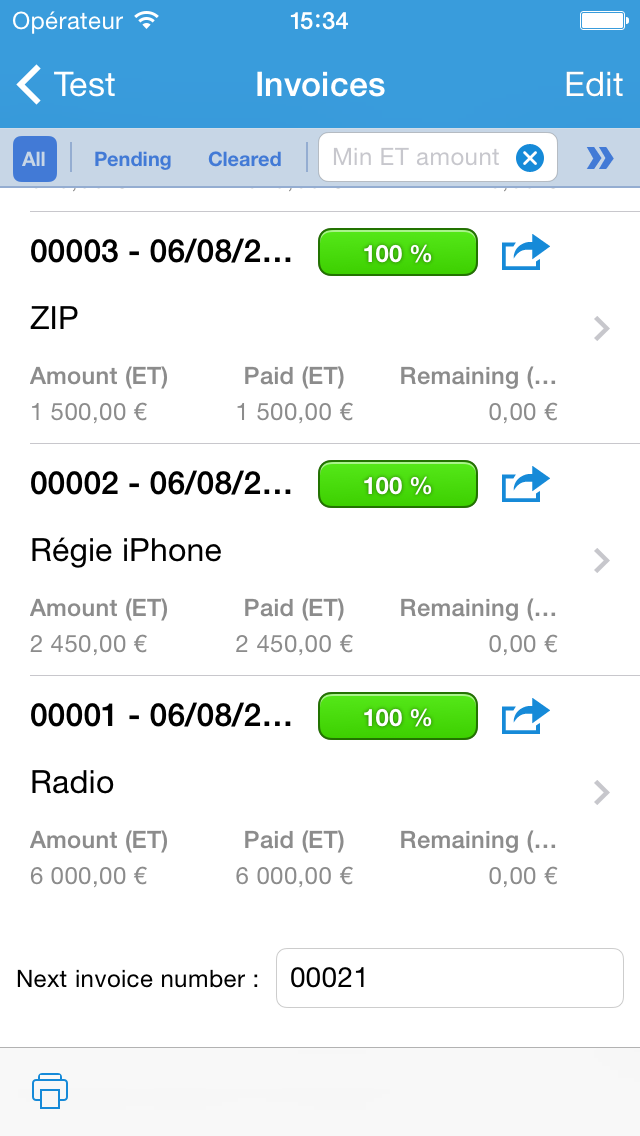
You can add or remove invoices by selecting the invoices line in the main list.
You can create automatically the transaction corresponding to an invoice by clicking on the action button in the top right corner and choosing "Create transaction".
You can print or email an invoice by clicking on the action button in the top right corner of each line. To do so you have to create an invoice template first by clicking on the templates button under the invoices list. Invoice templates should be written in HTML and are processed with MGTemplateEngine (Credits to Matt Gemmell). You can find more information on the syntax of the template engine here.
Making a taxes report
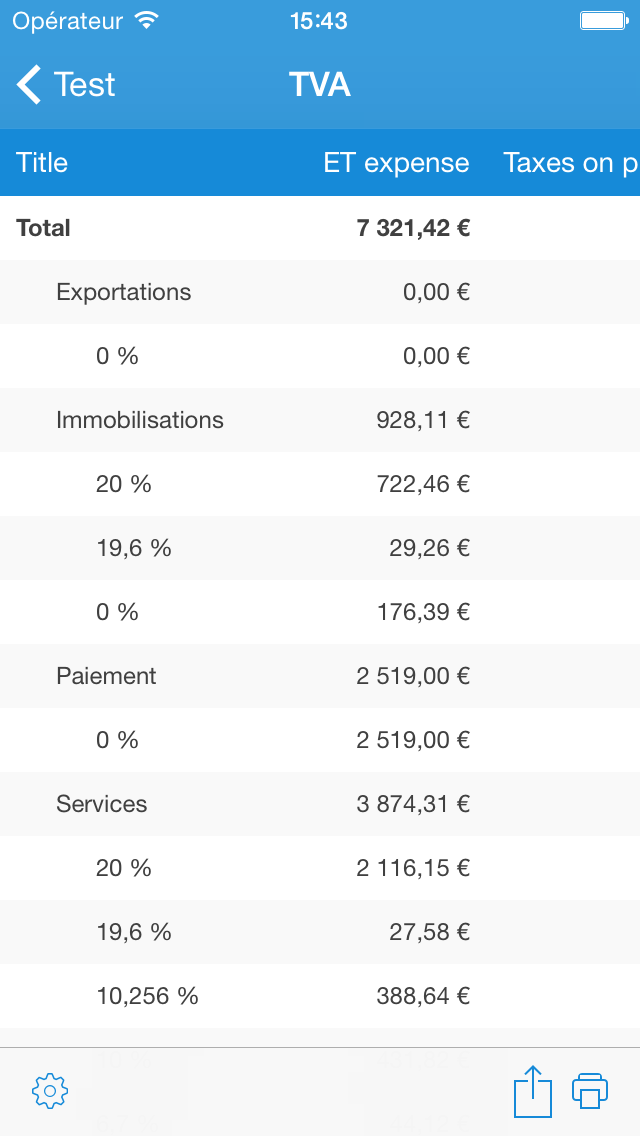
You can create a new report by clicking on the edit button in the top right corner of the main list and then by selecting the new report line. A taxes report is like a splits report but grouped by taxes category.